Rotating AWS KMS CMKs
- Key rotation is a very important in key management and a security best practice. In AWS KMS there are different ways to rotate keys according to the way they were created.
Rotate the CMK key was created from AWS Key Material
Set up to automatically rotate Key Material every year
For CMKs created with AWS key material, AWS KMS also saves the CMK’s older cryptographic material, so it can be used to decrypt data that it encrypted. Automatic key rotation preserves the properties of the CMK: key ID, key ARN, region, policies, and permissions do not change when the key is rotated, so you don´t need to manually update the alias of the CMK to point to a newly generated CMK.
- Assign EnableKeyRotation permission for Rotating AWS KMS CMK
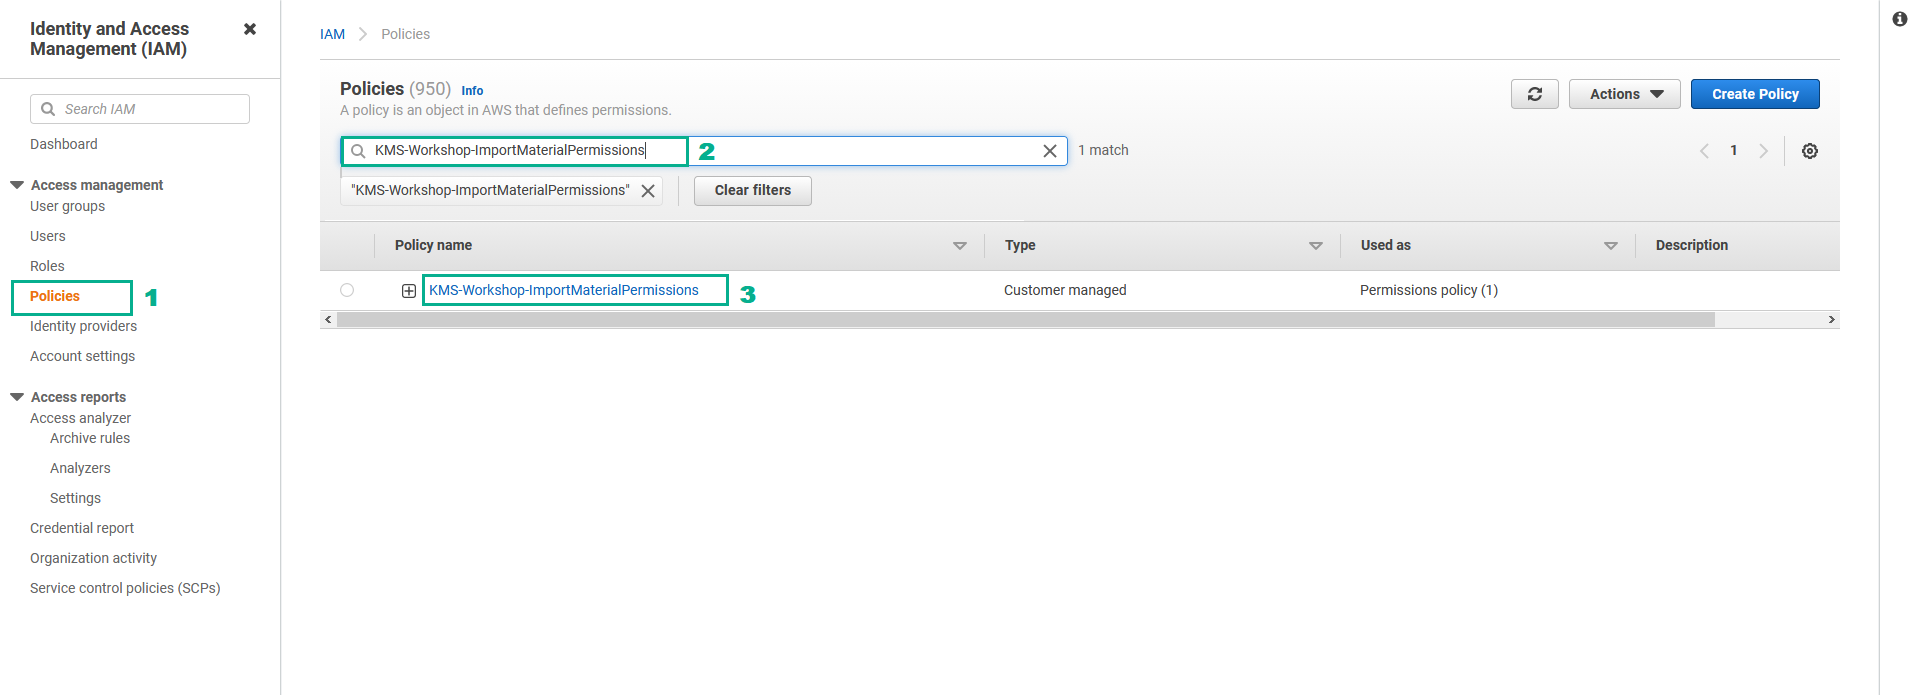
- Go to AWS IAM Console.
- Click Policies.
- Type
KMS-Workshop-ImportMaterialPermissionsinto the search bar, press Enter - Click KMS-Workshop-ImportMaterialPermissions
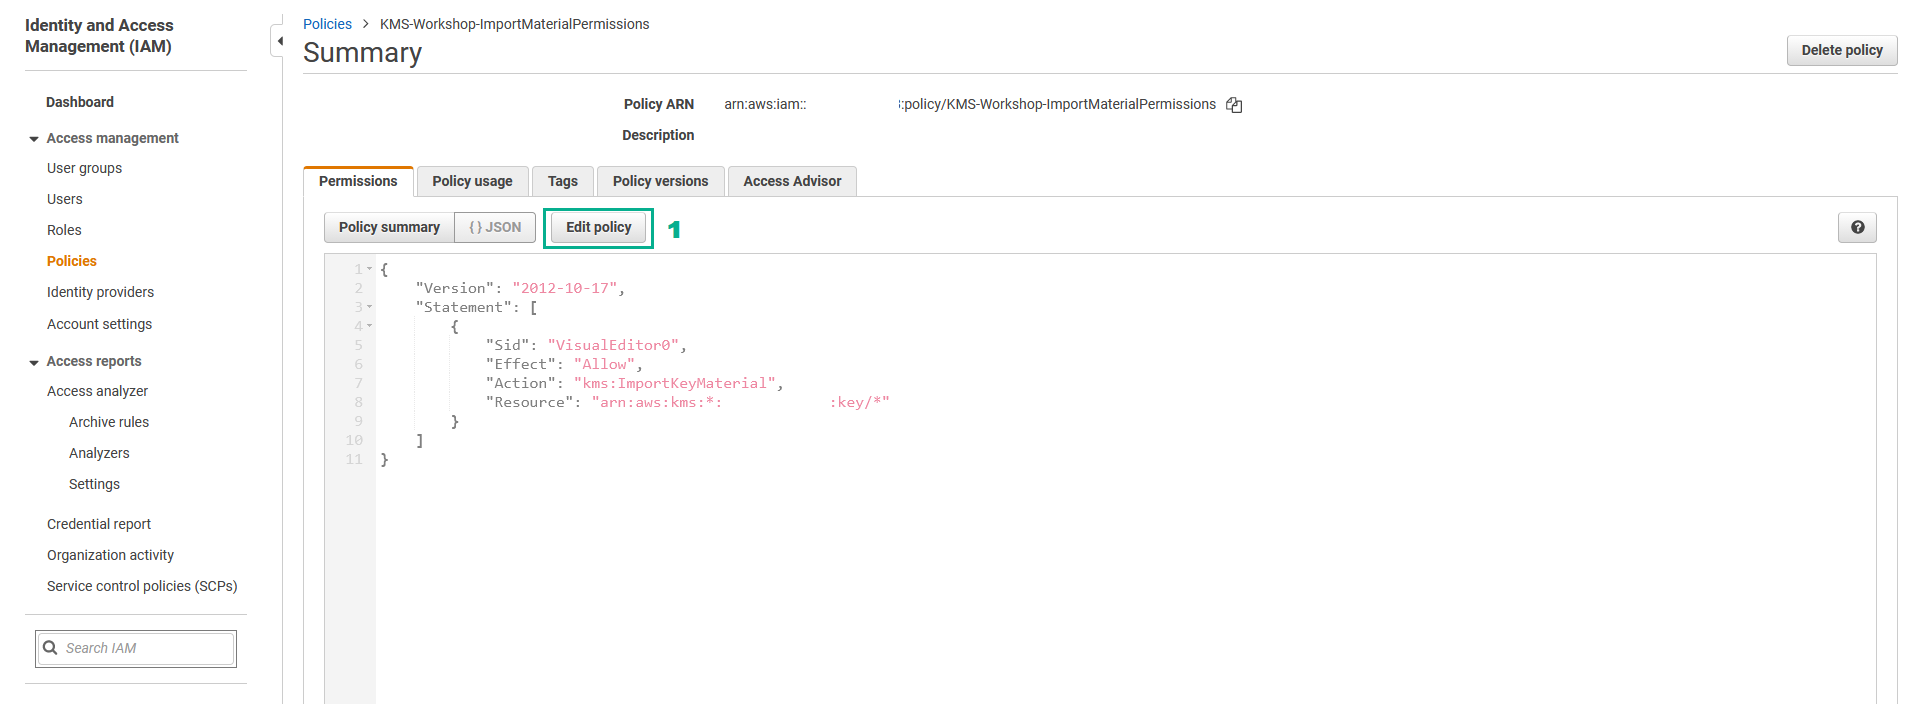
- In the Summary page
- Click Edit policy
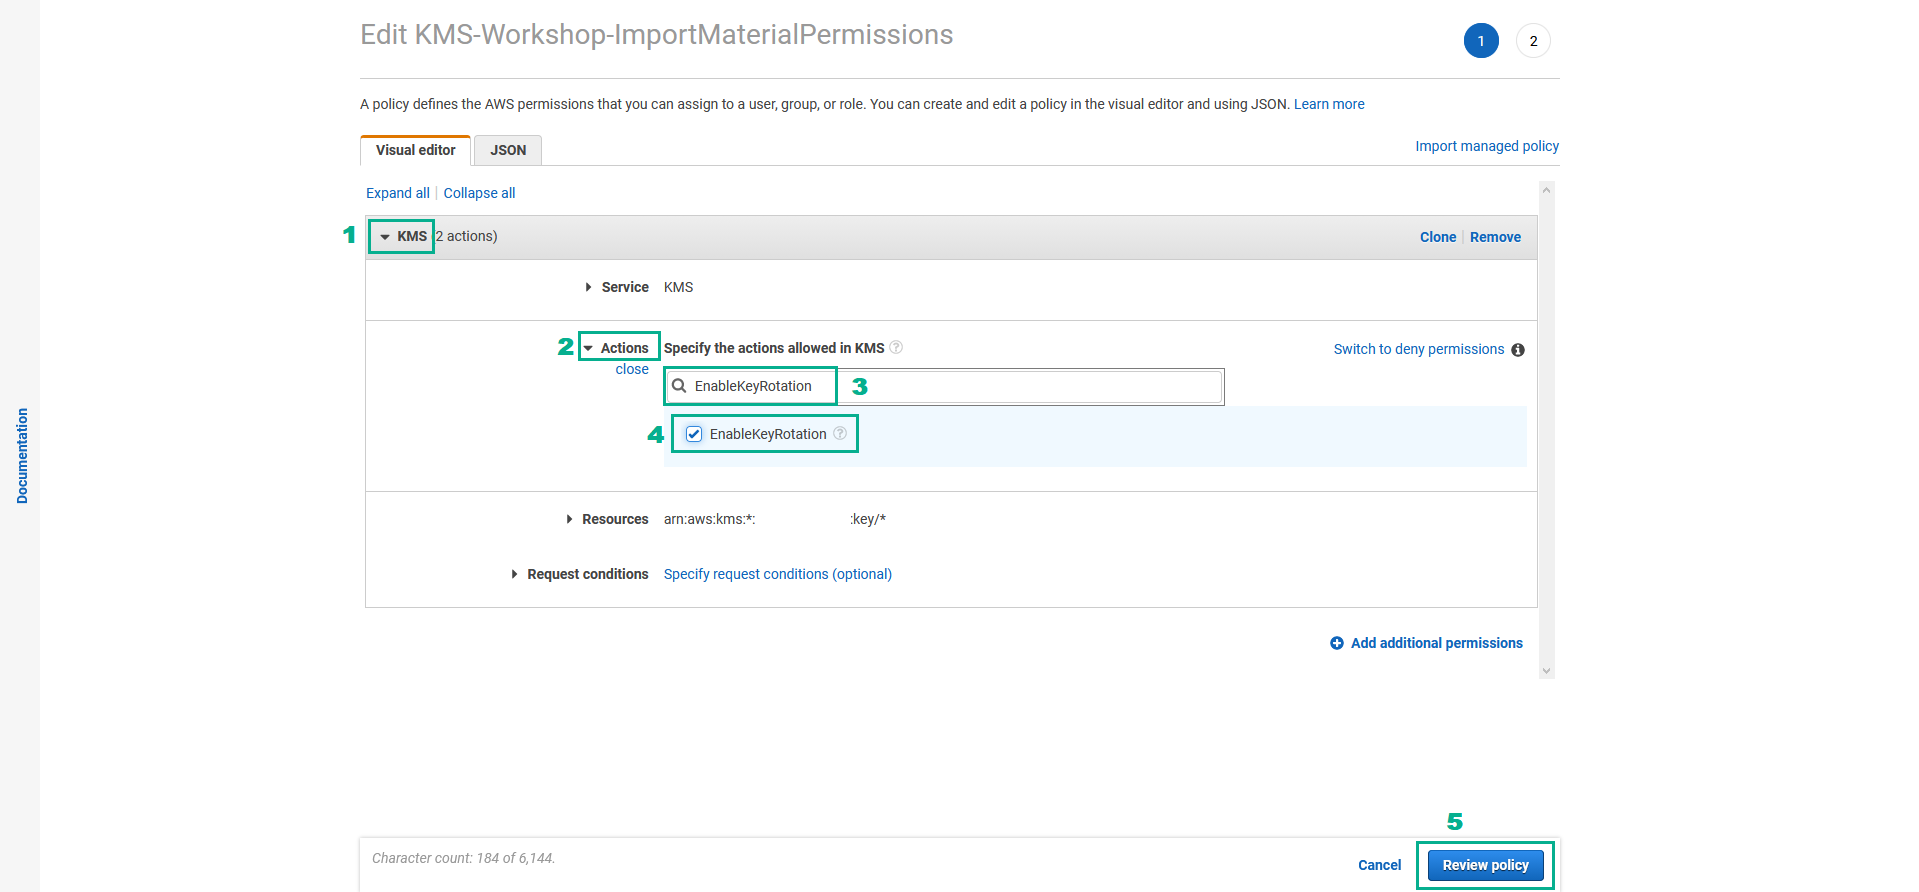
- In the Edit KMS-Workshop-ImportMaterialPermissions page
- Click KMS
- Click Actions
- Type
EnableKeyRotationinto the search bar - Select
EnableKeyRotation - Click Review policy
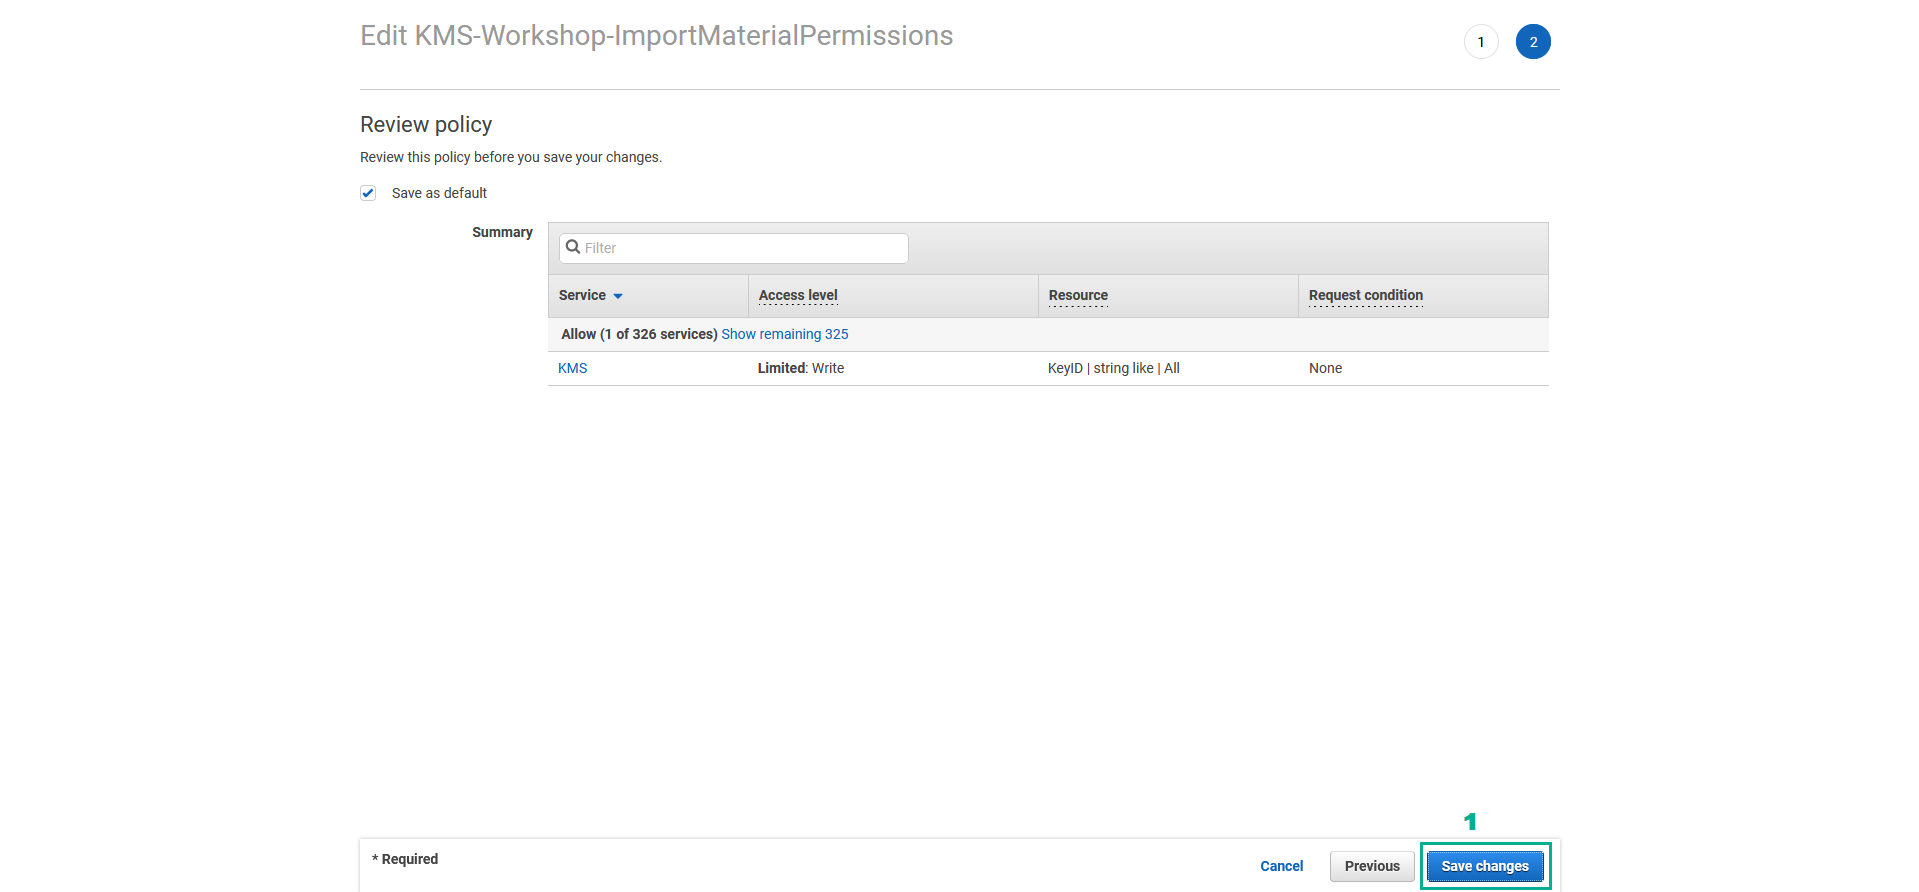
- In the Review policy page
- Click Save changes
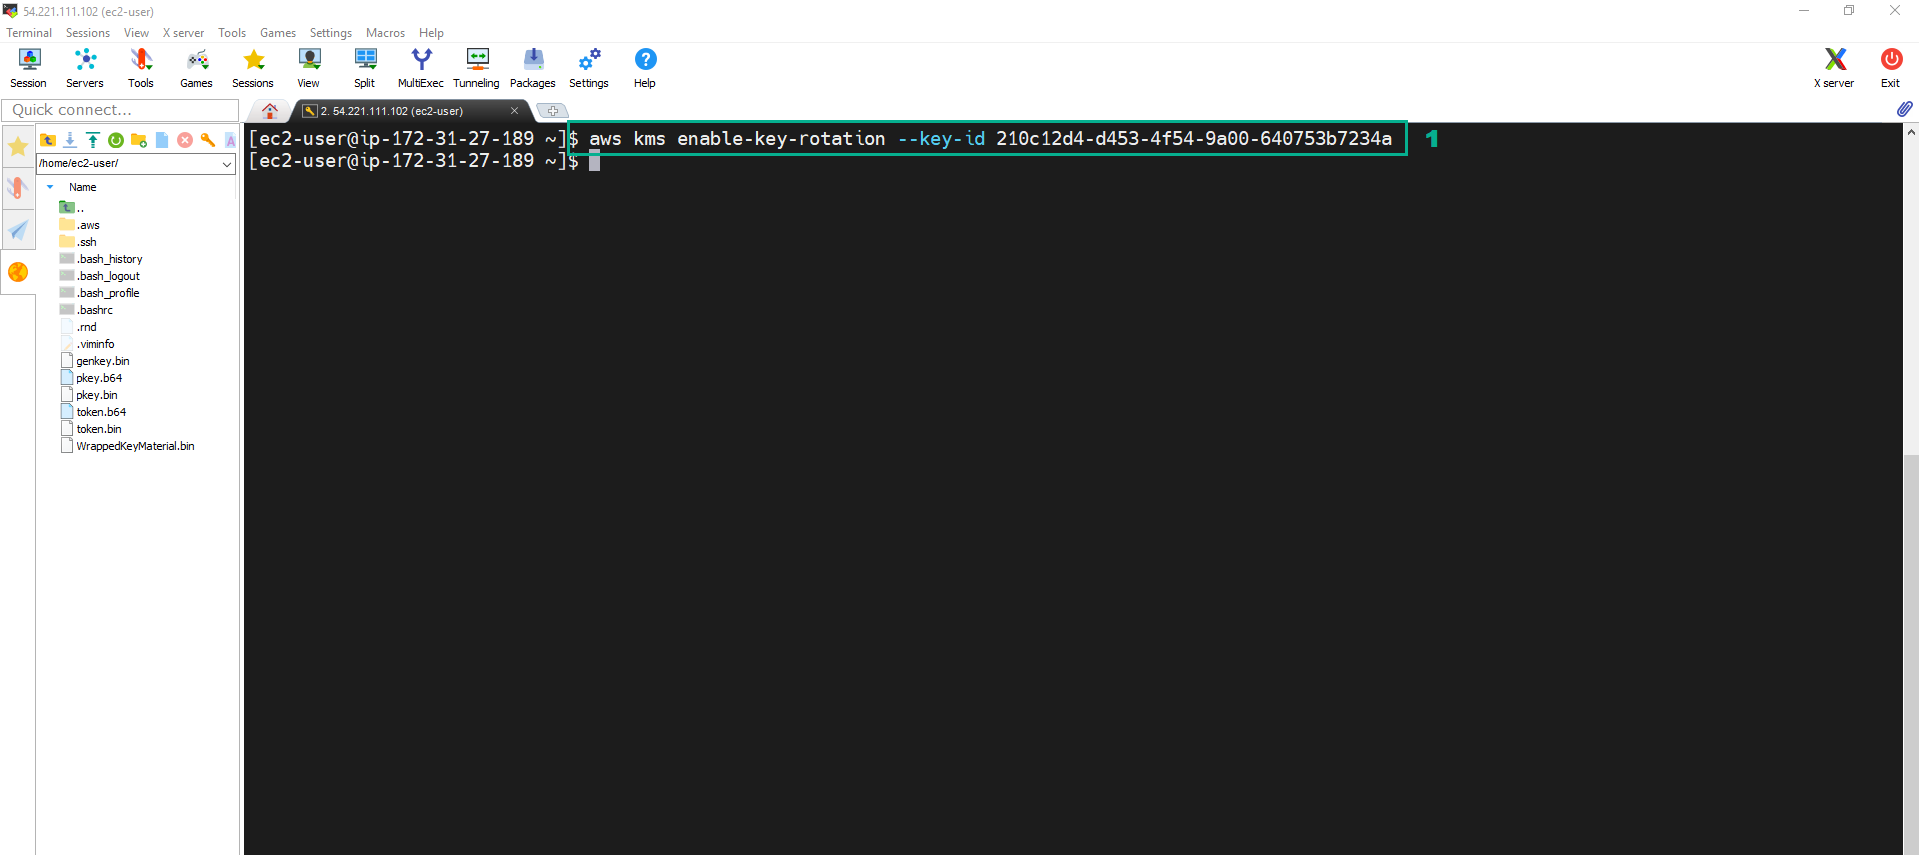
- Execute the below command to automatically Rotate AWS KMS CMK
aws kms enable-key-rotation --key-id <key ID of FirstCMK>
Another way to rotate the CMKs built with AWS key material is to generate a new key, then update the Alias for the CMK.
- Assign UpdateAlias permission to update the Alias for the CMK. Assign DeleteImportedKeyMaterial permission, DisableKey permission, EnableKey permission and ScheduleKeyDeletion permission to use in the next section.
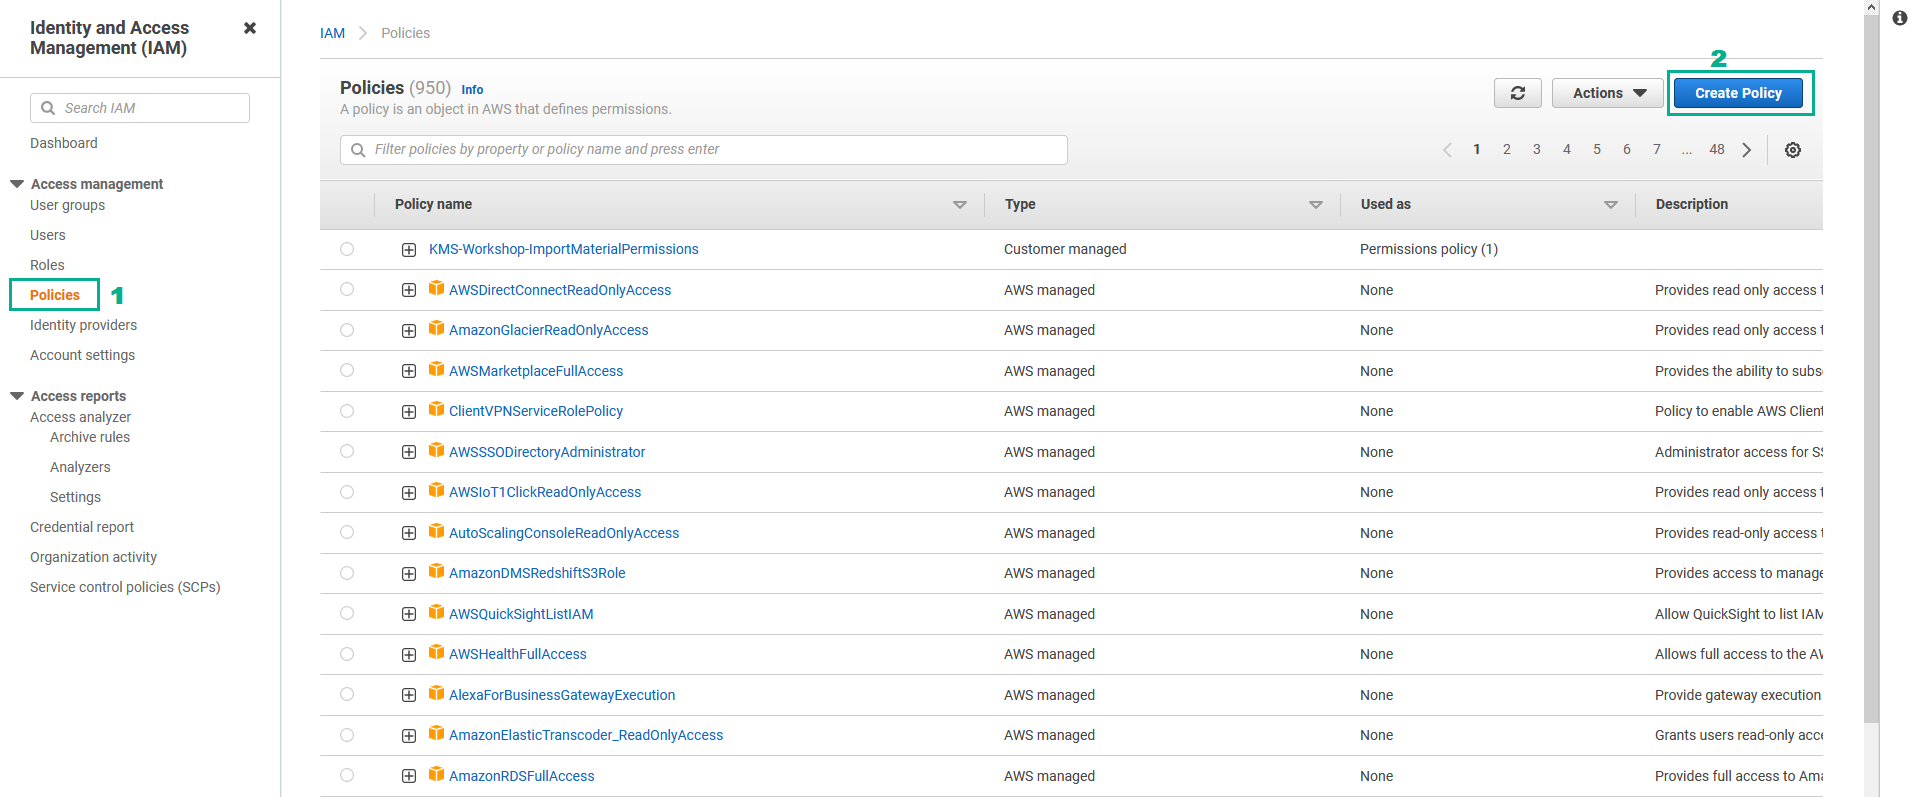
- Go to AWS IAM Console.
- Click Policies.
- Click Create Policy.
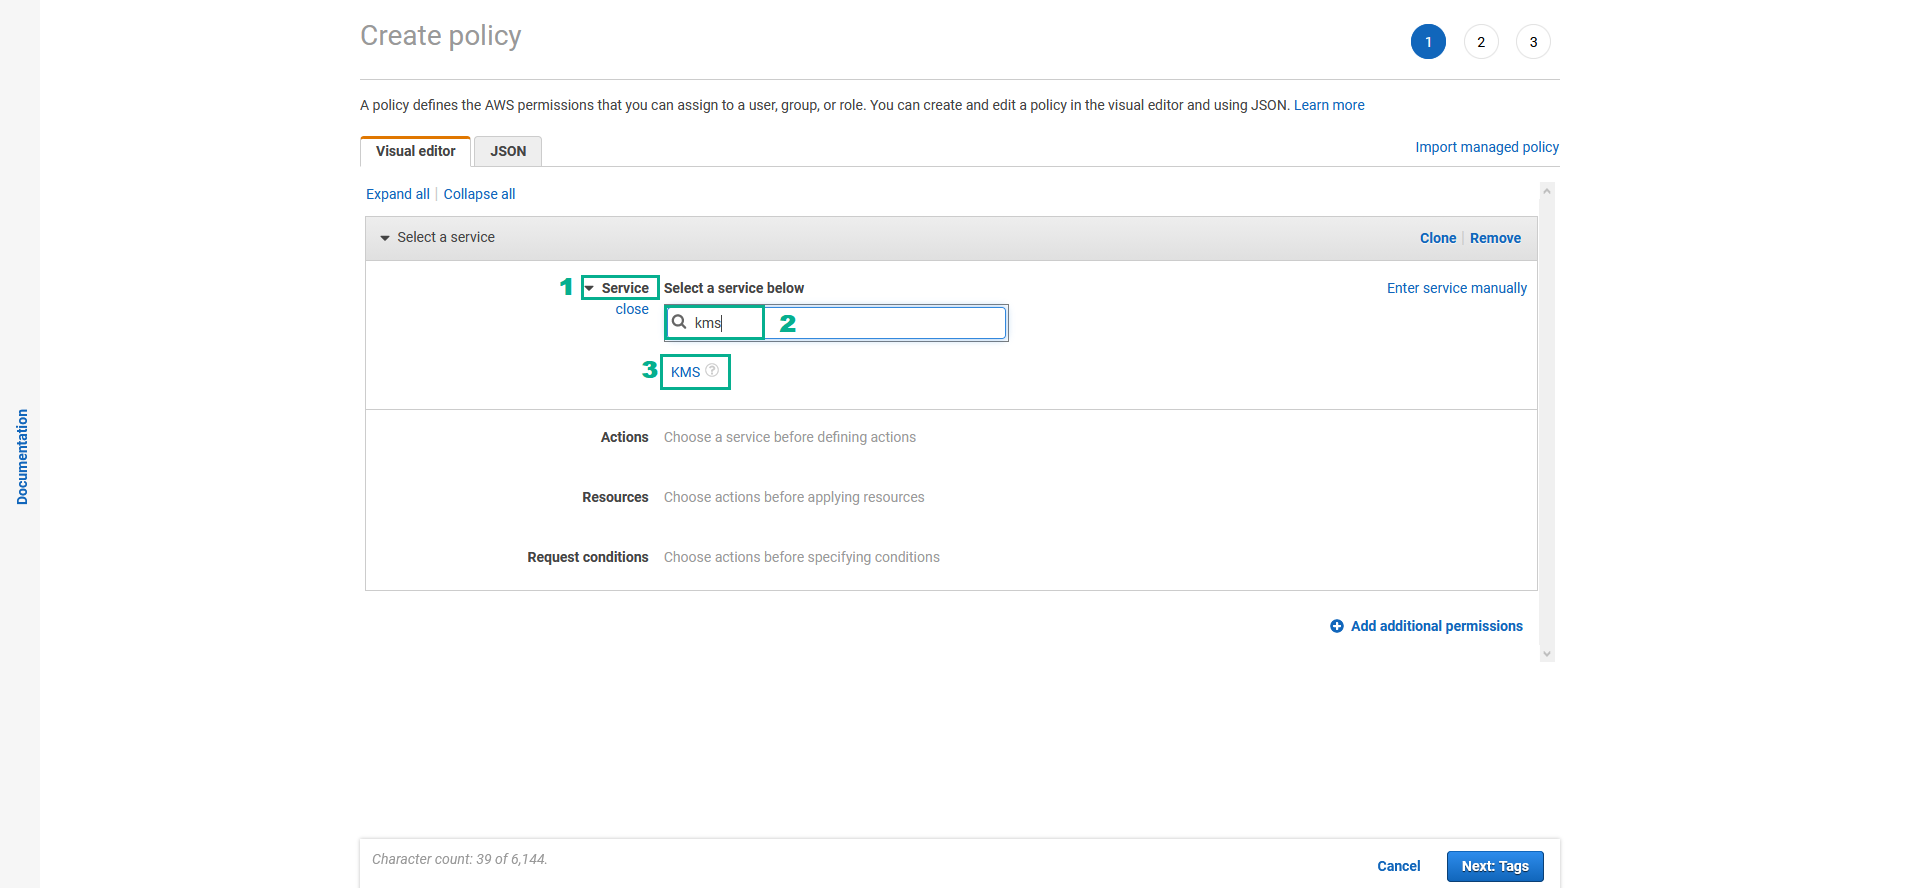
- In the Create policy page
- Click Service.
- Type
kmsinto the search bar. - Click KMS
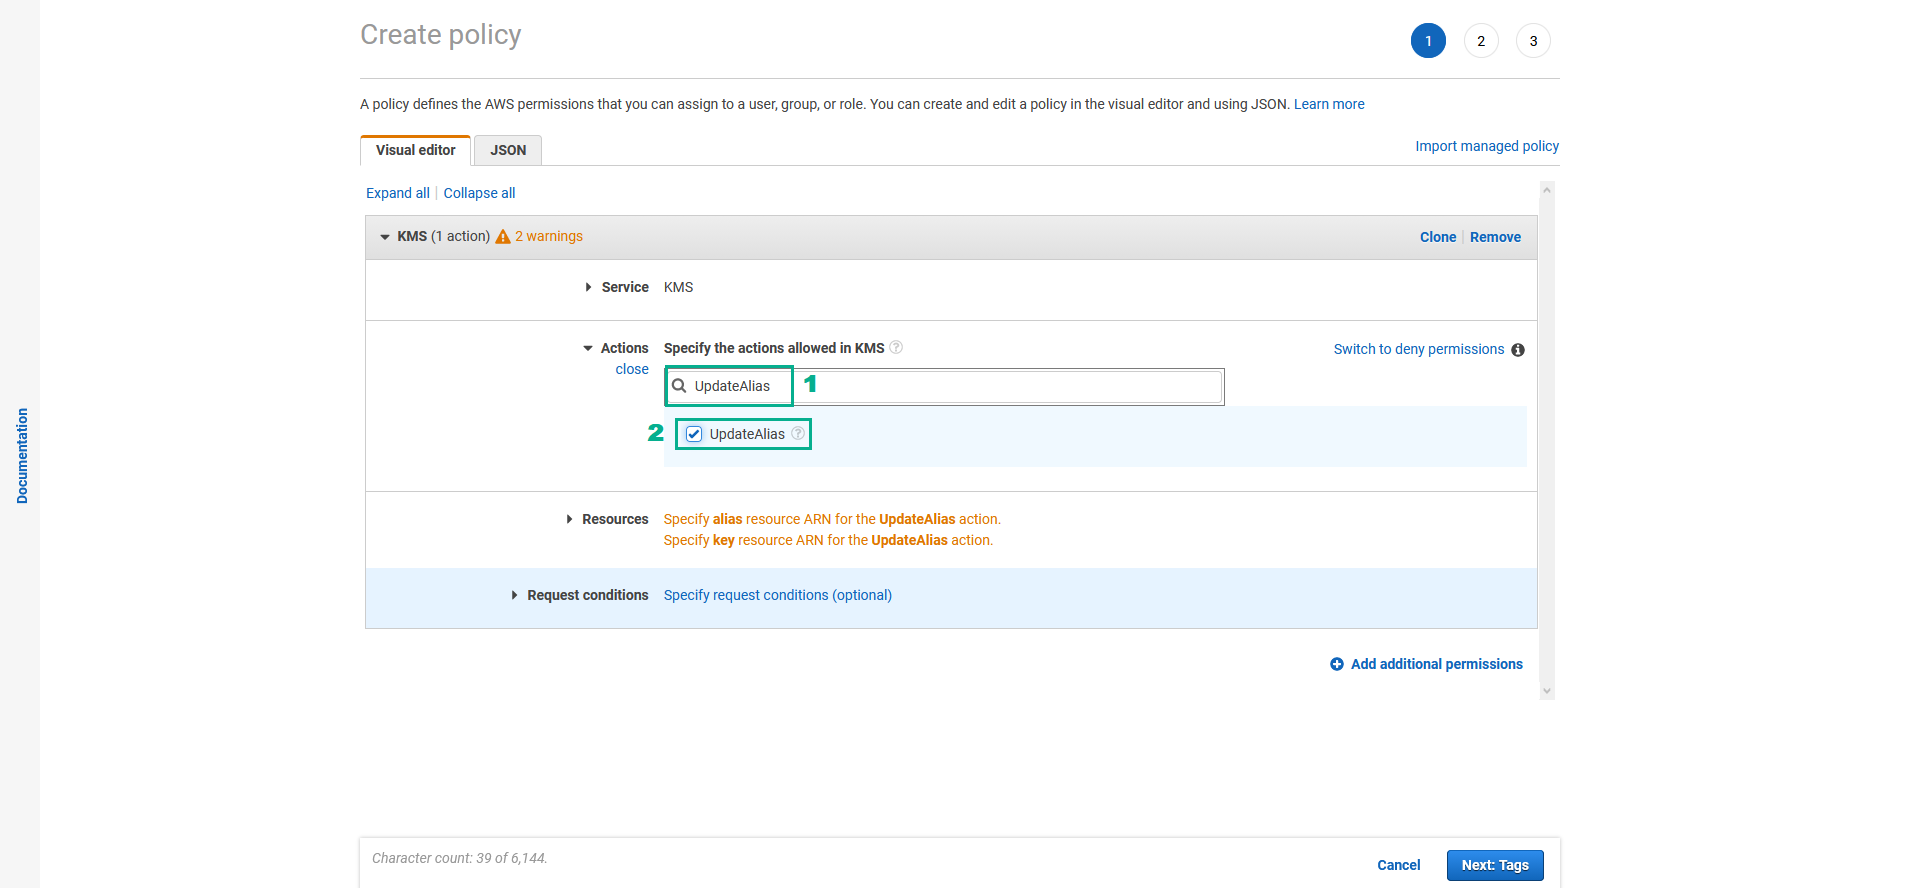
- In the Actions section
- Assign UpdateAlias permission
- Type
UpdateAliasinto the search bar - Select UpdateAlias
- Type
- Do the same for DeleteImportedKeyMaterial permission, DisableKey permission, EnableKey permission and ScheduleKeyDeletion permission
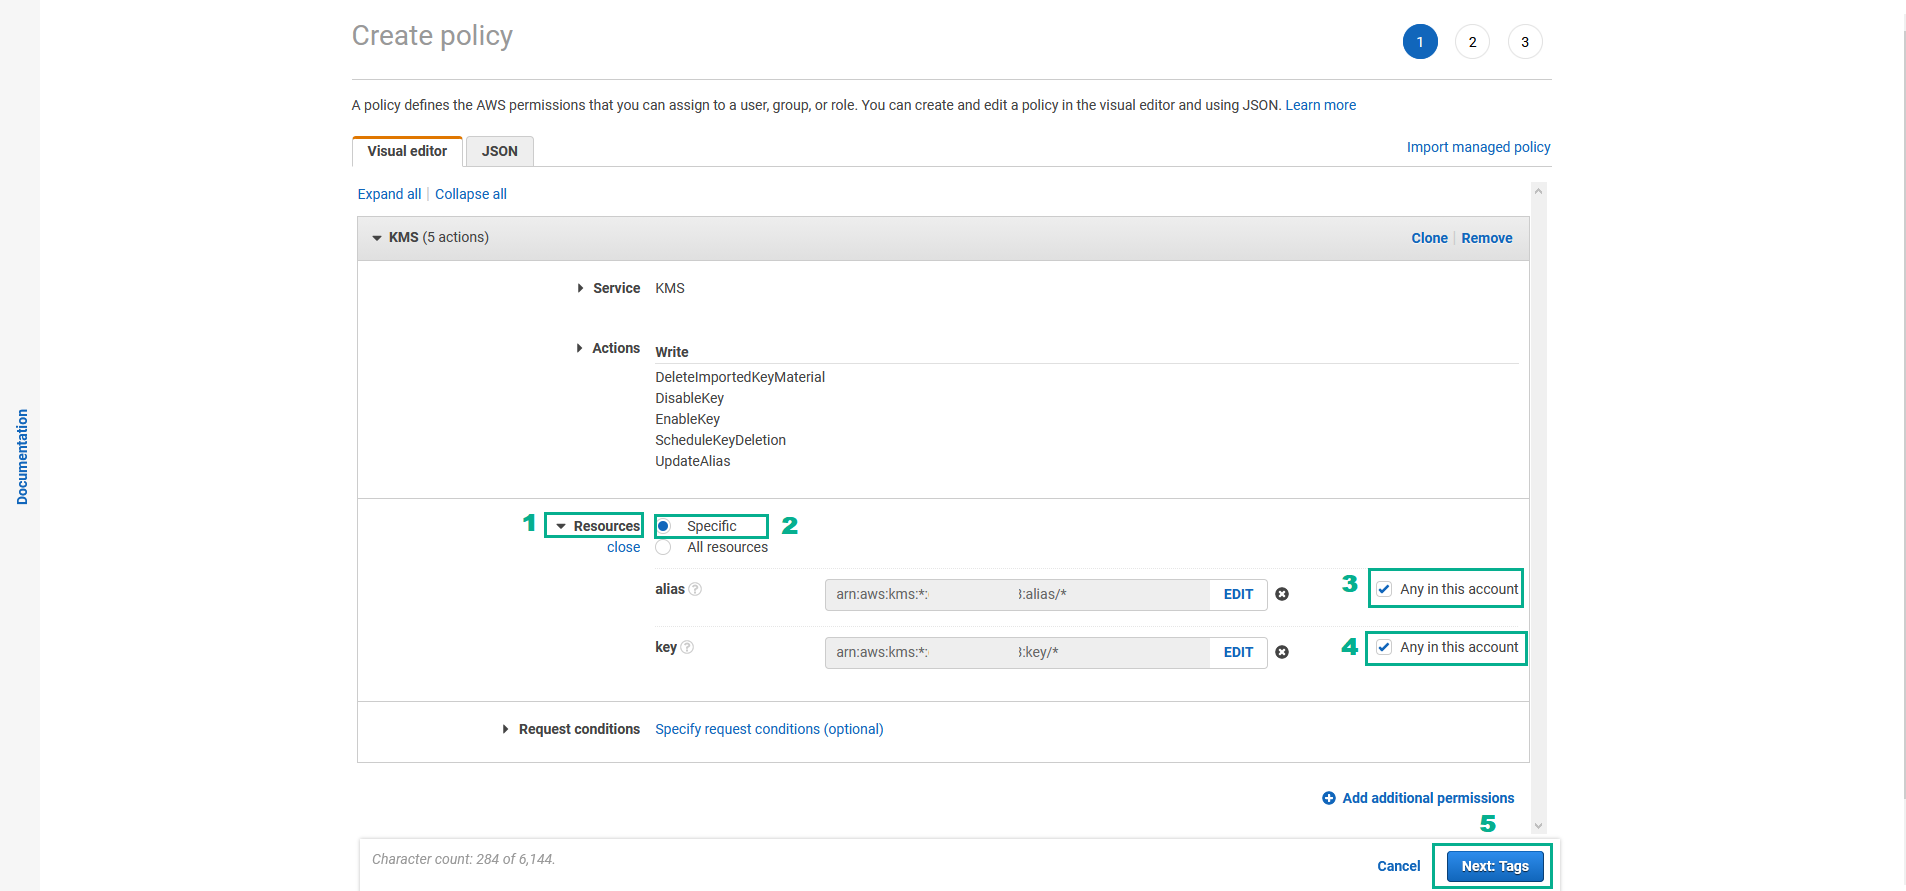
- In the Resources section
- Click Resources
- Select Specific
- In the alias section, Select Any in this account
- In the key section, Select Any in this account
- Click Next:Tags
- In the Add tags page
- Click Next:Review

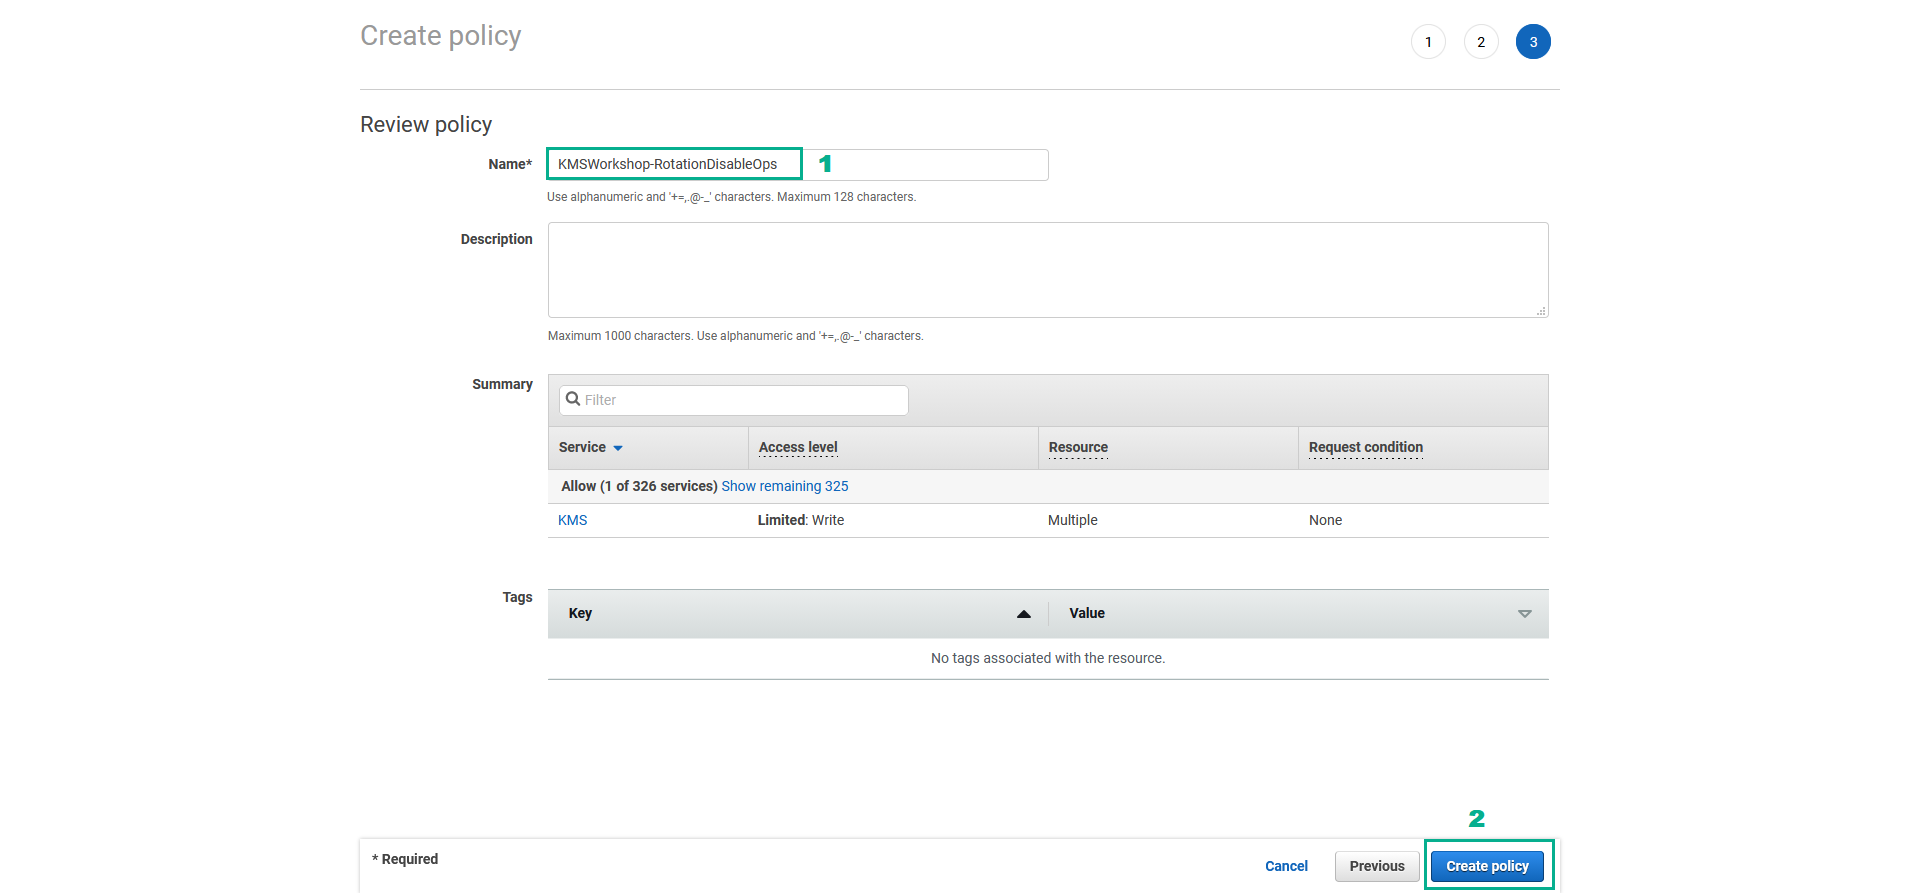
- In the Review policy page
- In the Name section, type
KMSWorkshop-RotationDisableOps - Click Create Policy
- Attach KMSWorkshop-RotationDisableOps policy to KMSWorkshop-InstanceInitRole role
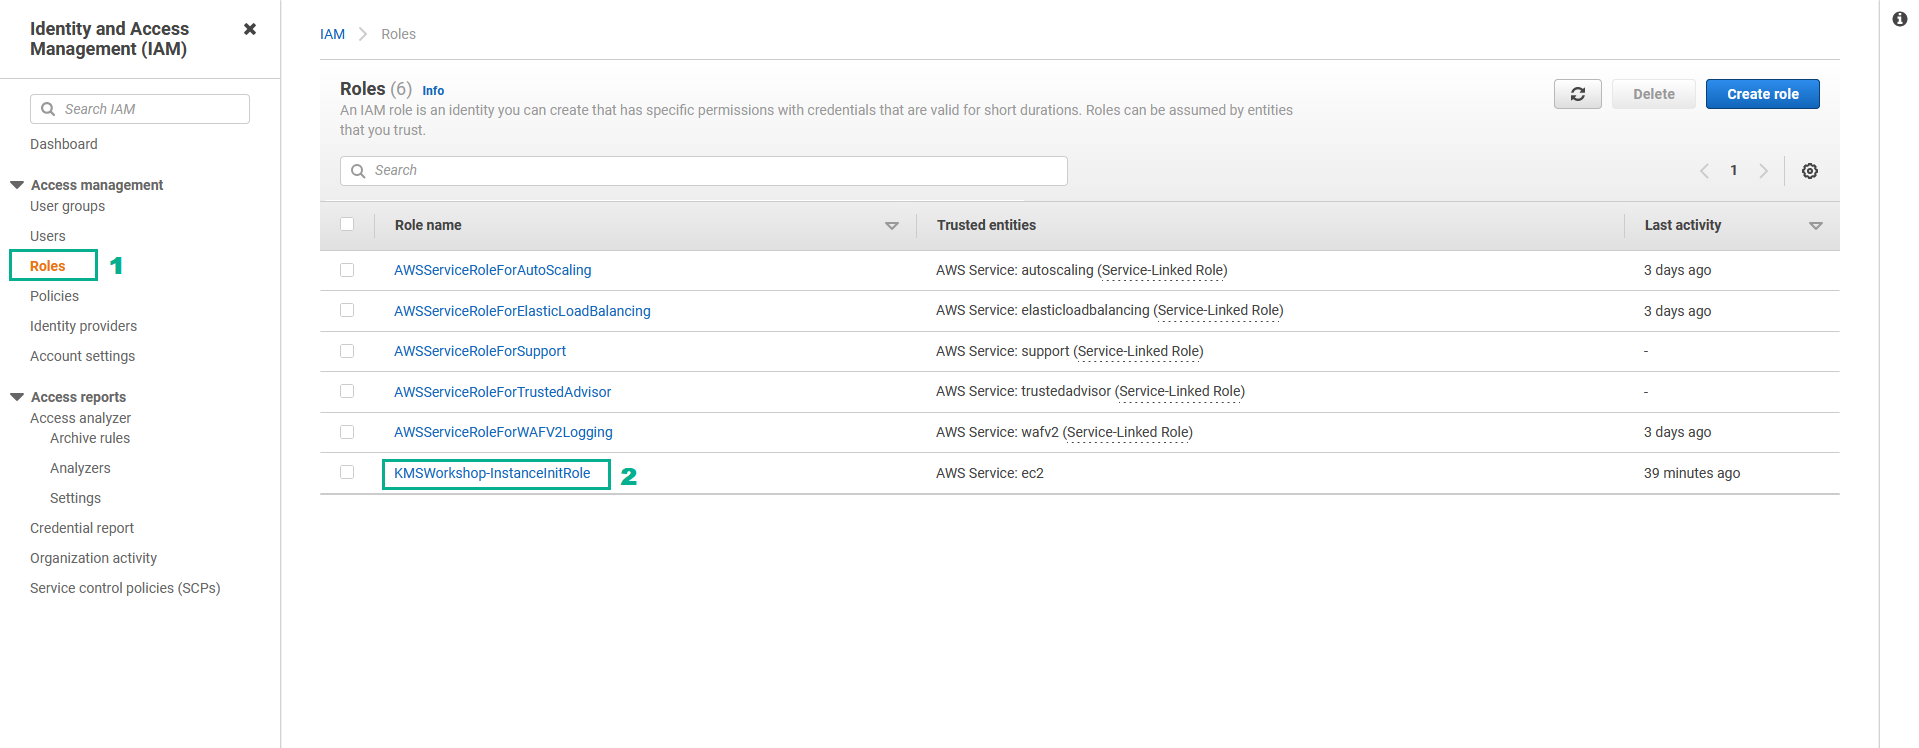
- Go to AWS IAM Console.
- Click Roles.
- Click KMSWorkshop-InstanceInitRole.
- In the Permissions policies section
- Click Add permissions.
- Click Attach policies.

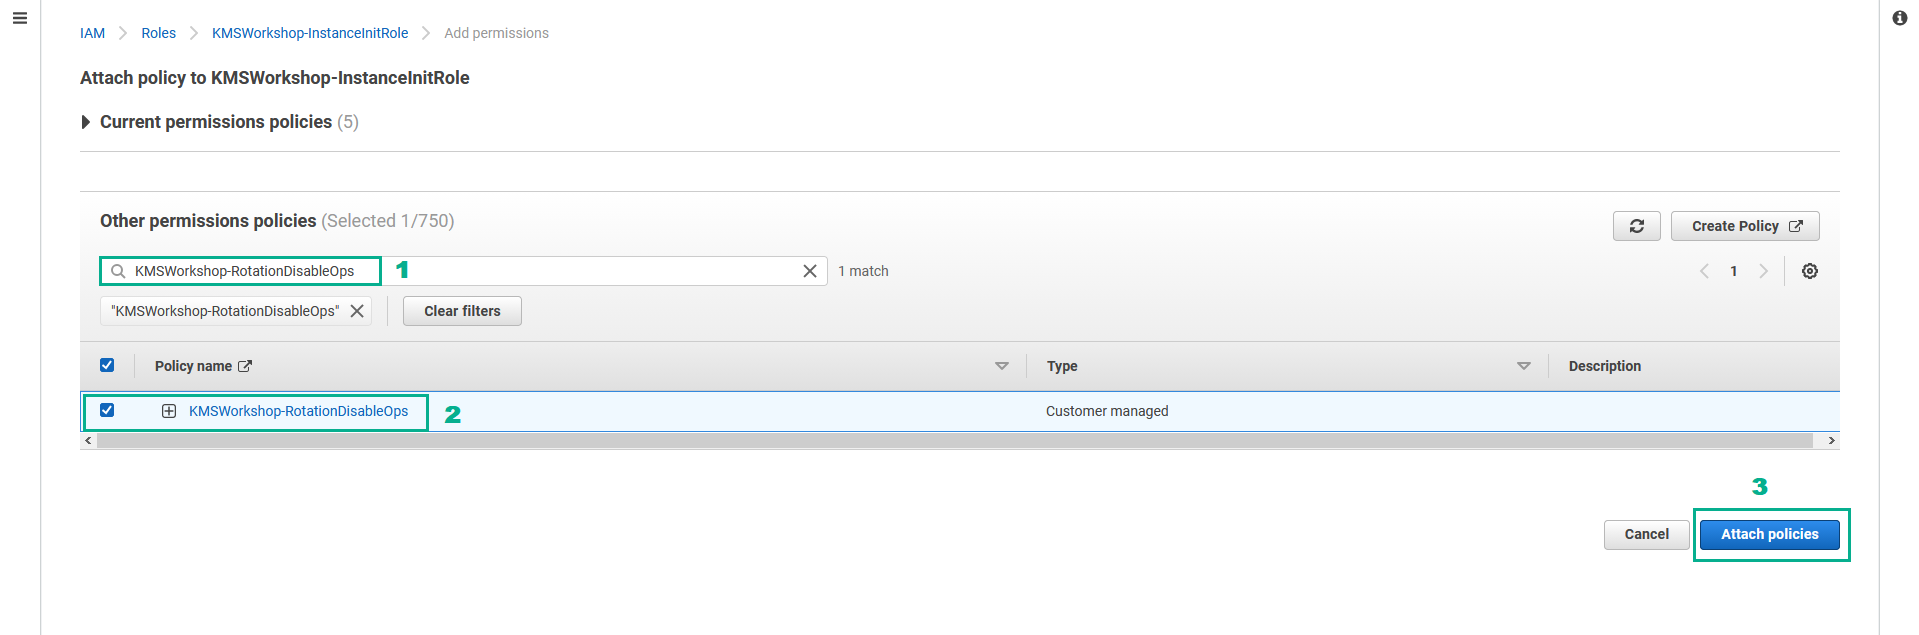
- In the Other permissions policies section
- Type
KMSWorkshop-RotationDisableOpsinto the search bar, press Enter - Select KMSWorkshop-RotationDisableOps.
- Click Attach policies.
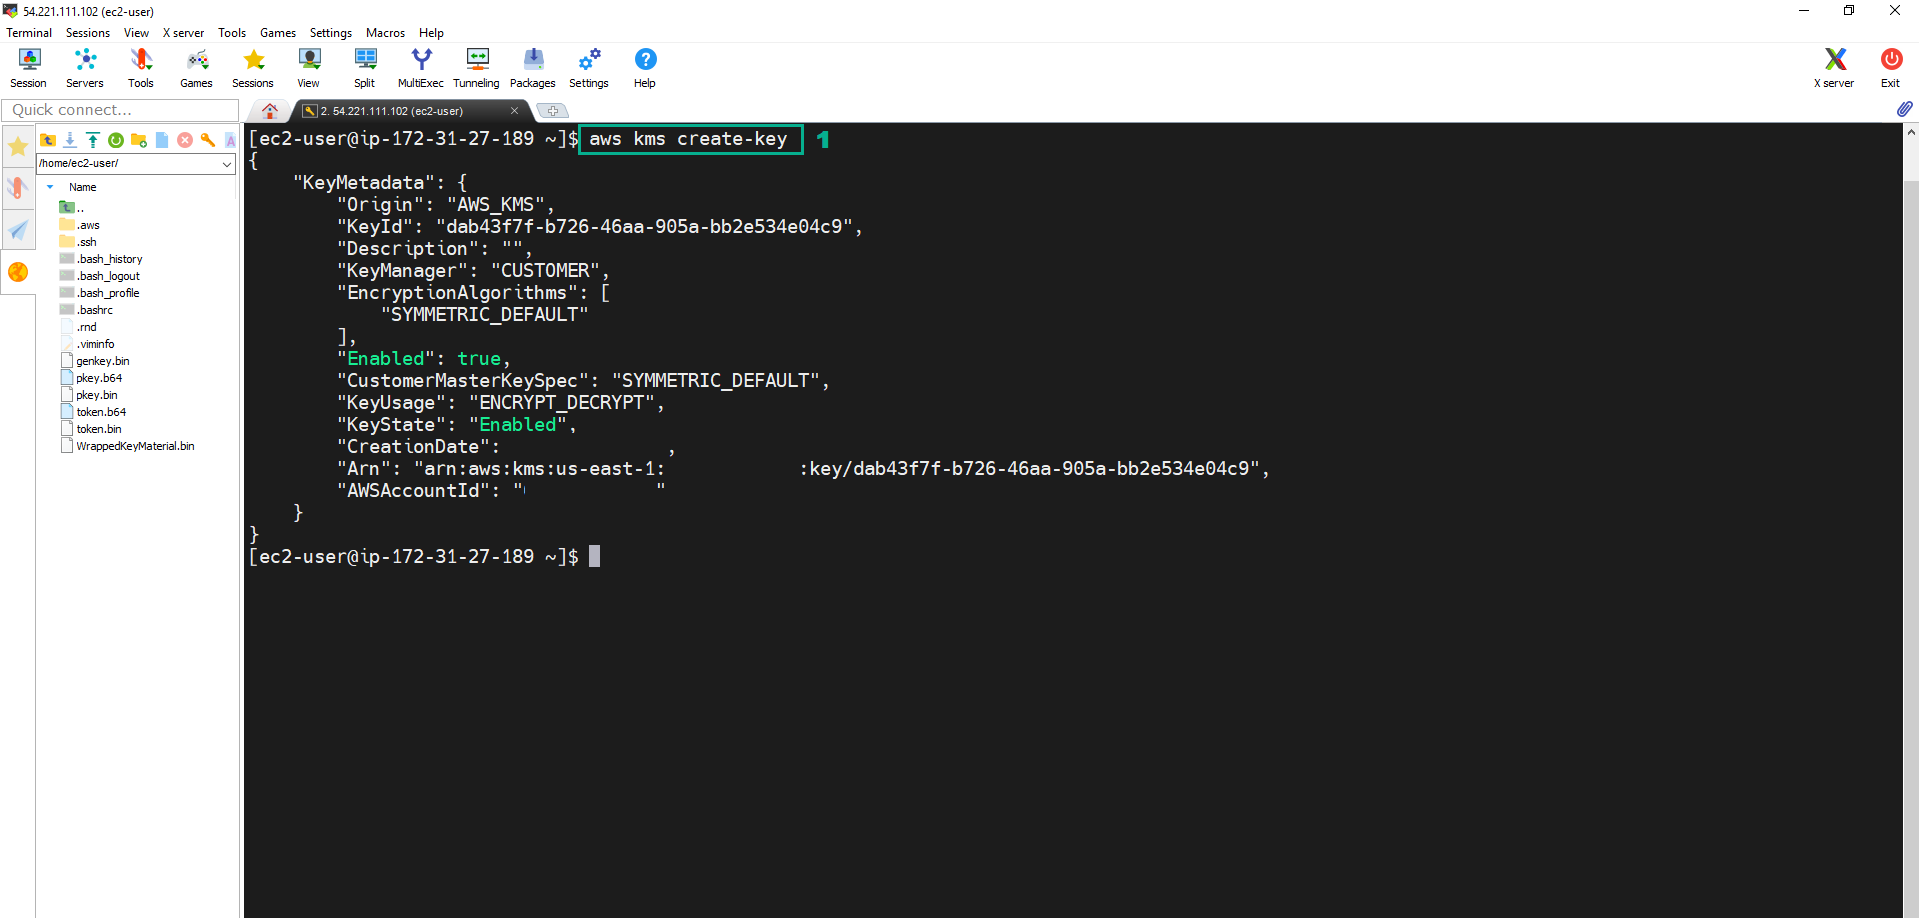
- Execute the below command to create the new CMK Key
aws kms create-key
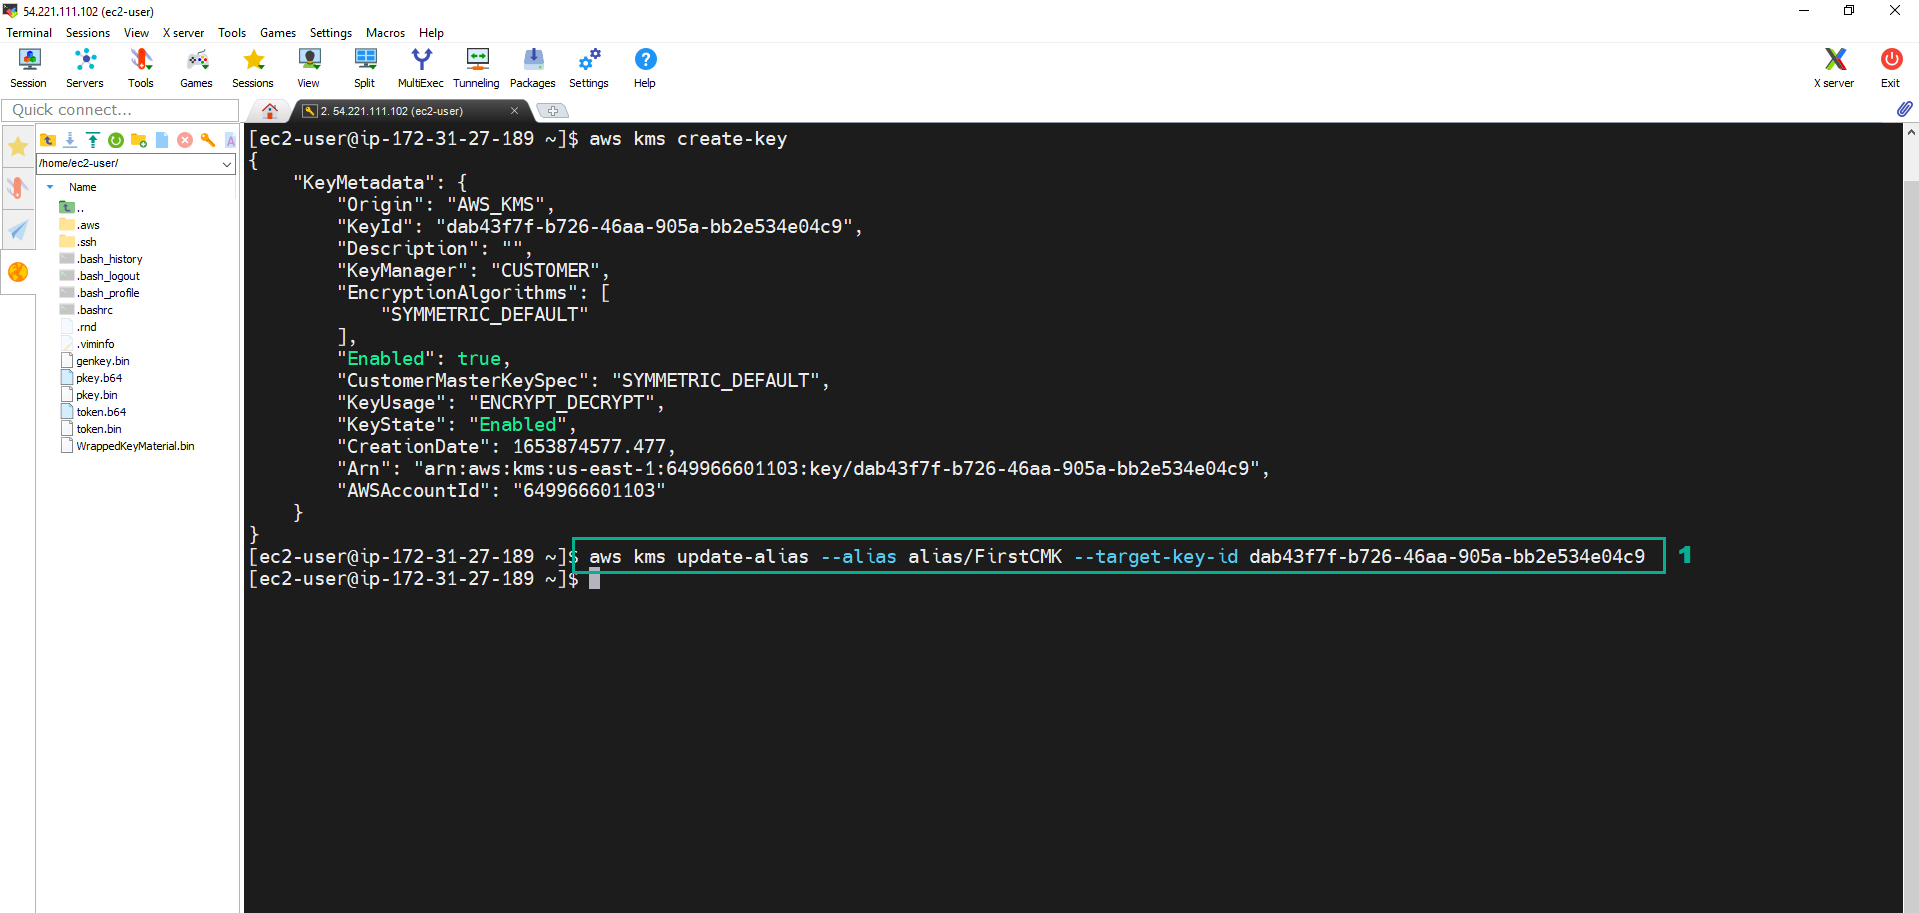
 11. Execute the below command to update the CMK Alias
aws kms update-alias --alias alias/FirstCMK --target-key-id <key ID of CMK we created in step 10>
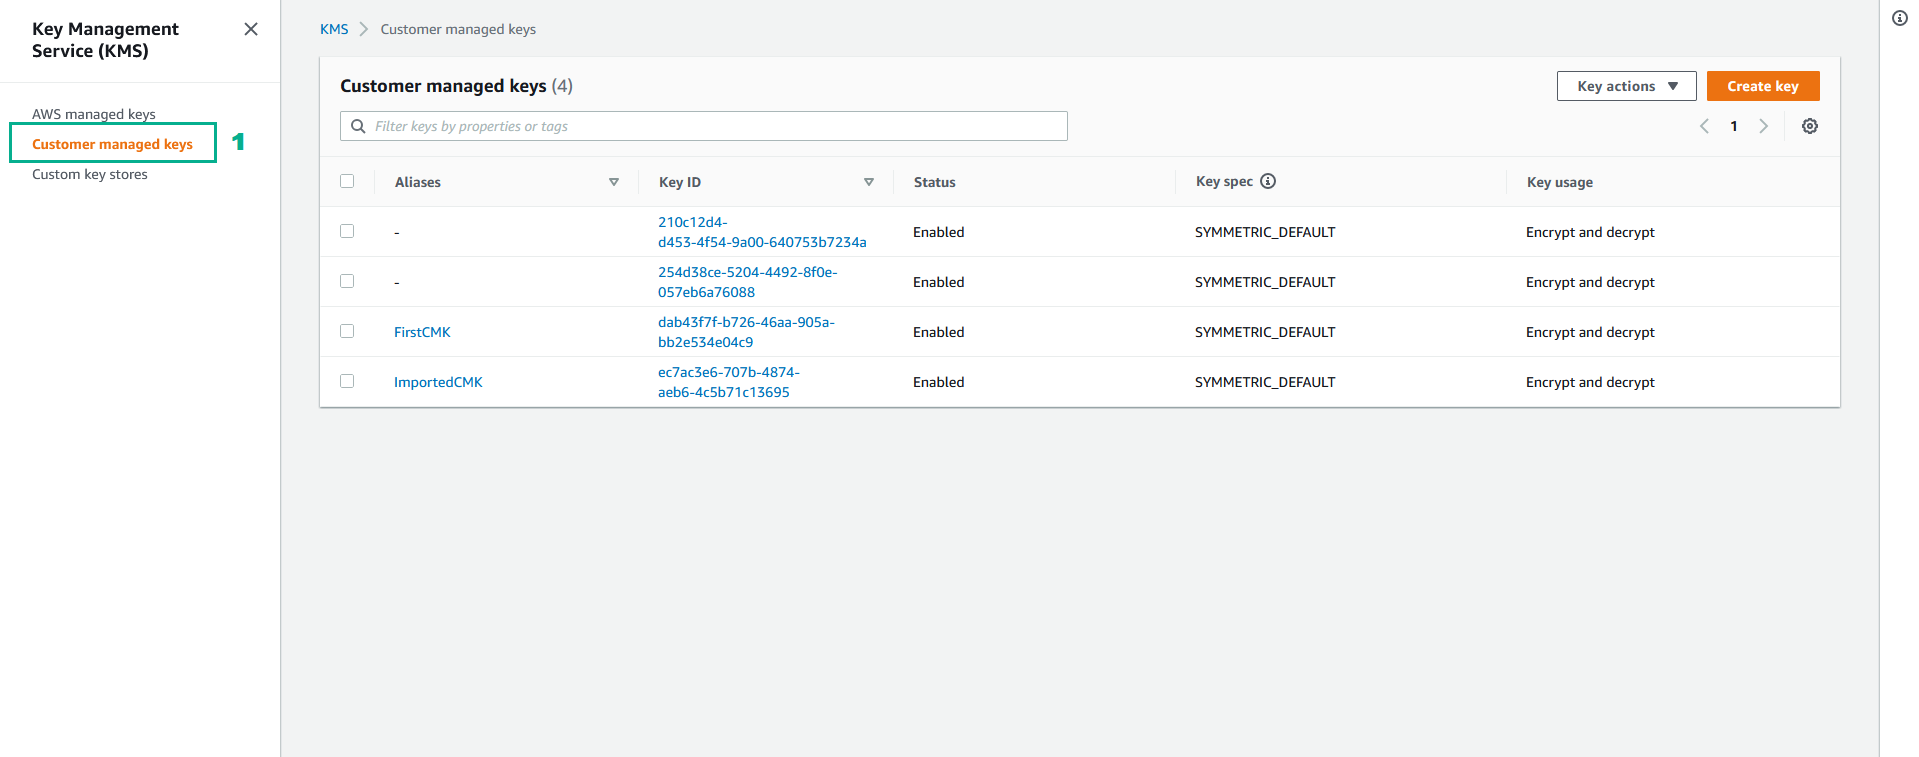
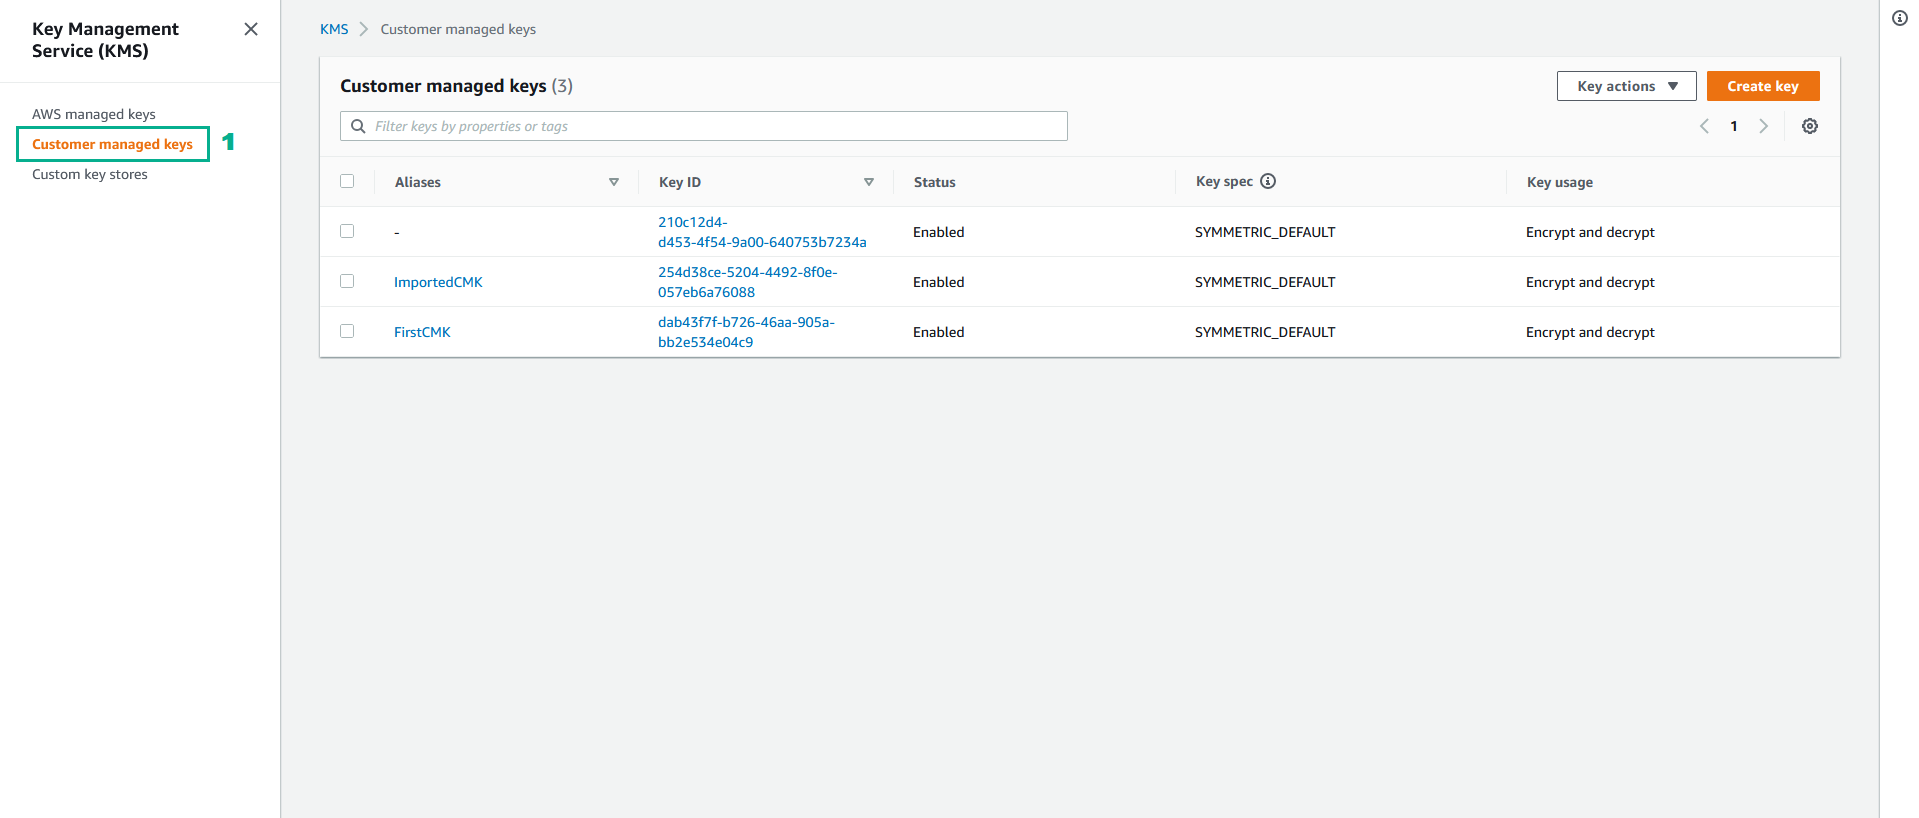
 12. To check we go to KMS Console
- Click Customer managed keys
Rotate the CMK was create by External Key Material
With the CMK was create by External Key Material, automatic rotation is not possible. You need to create a new CMK was create by External Key Material and update the CMK Alias
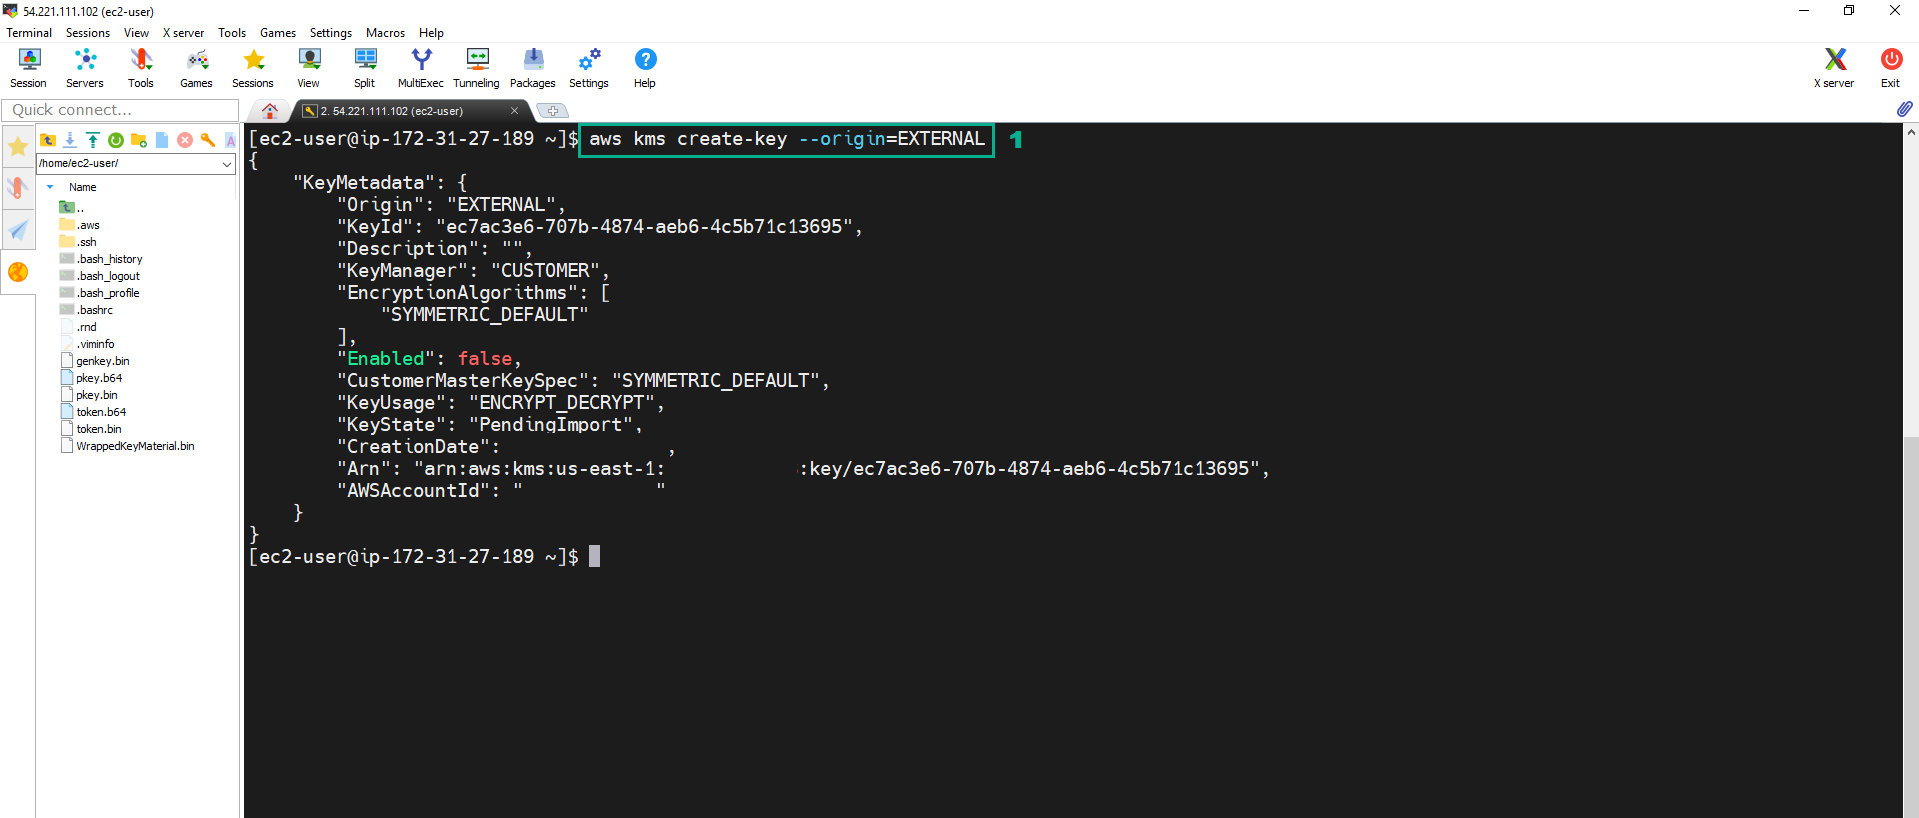
- Execute the below command để tạo External CMK mới
aws kms create-key --origin=EXTERNAL
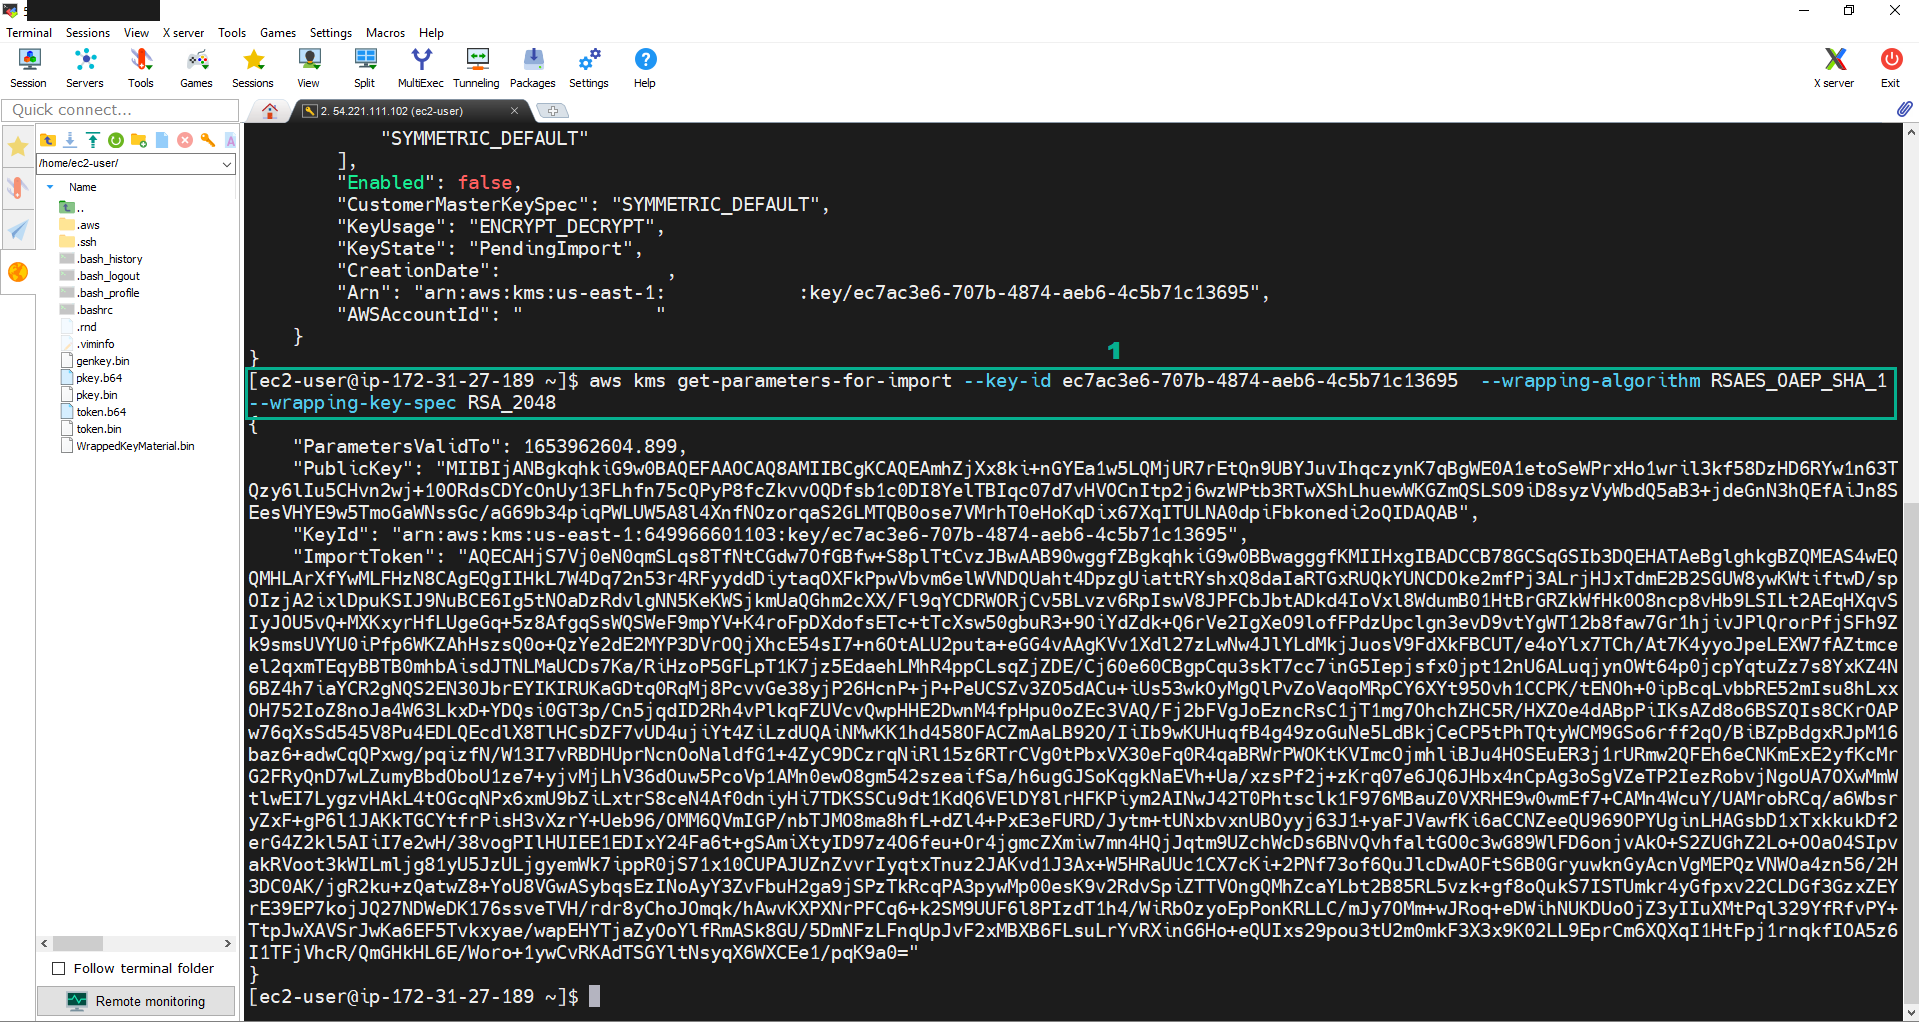
 2. Execute the command:
aws kms get-parameters-for-import --key-id <key ID of the External CMK we created in step 1> --wrapping-algorithm RSAES_OAEP_SHA_1 --wrapping-key-spec RSA_2048
 3. Copy PublicKey into pkey.b64 file.
- Copy PublicKey.
- Execute the command:
vi pkey.b64.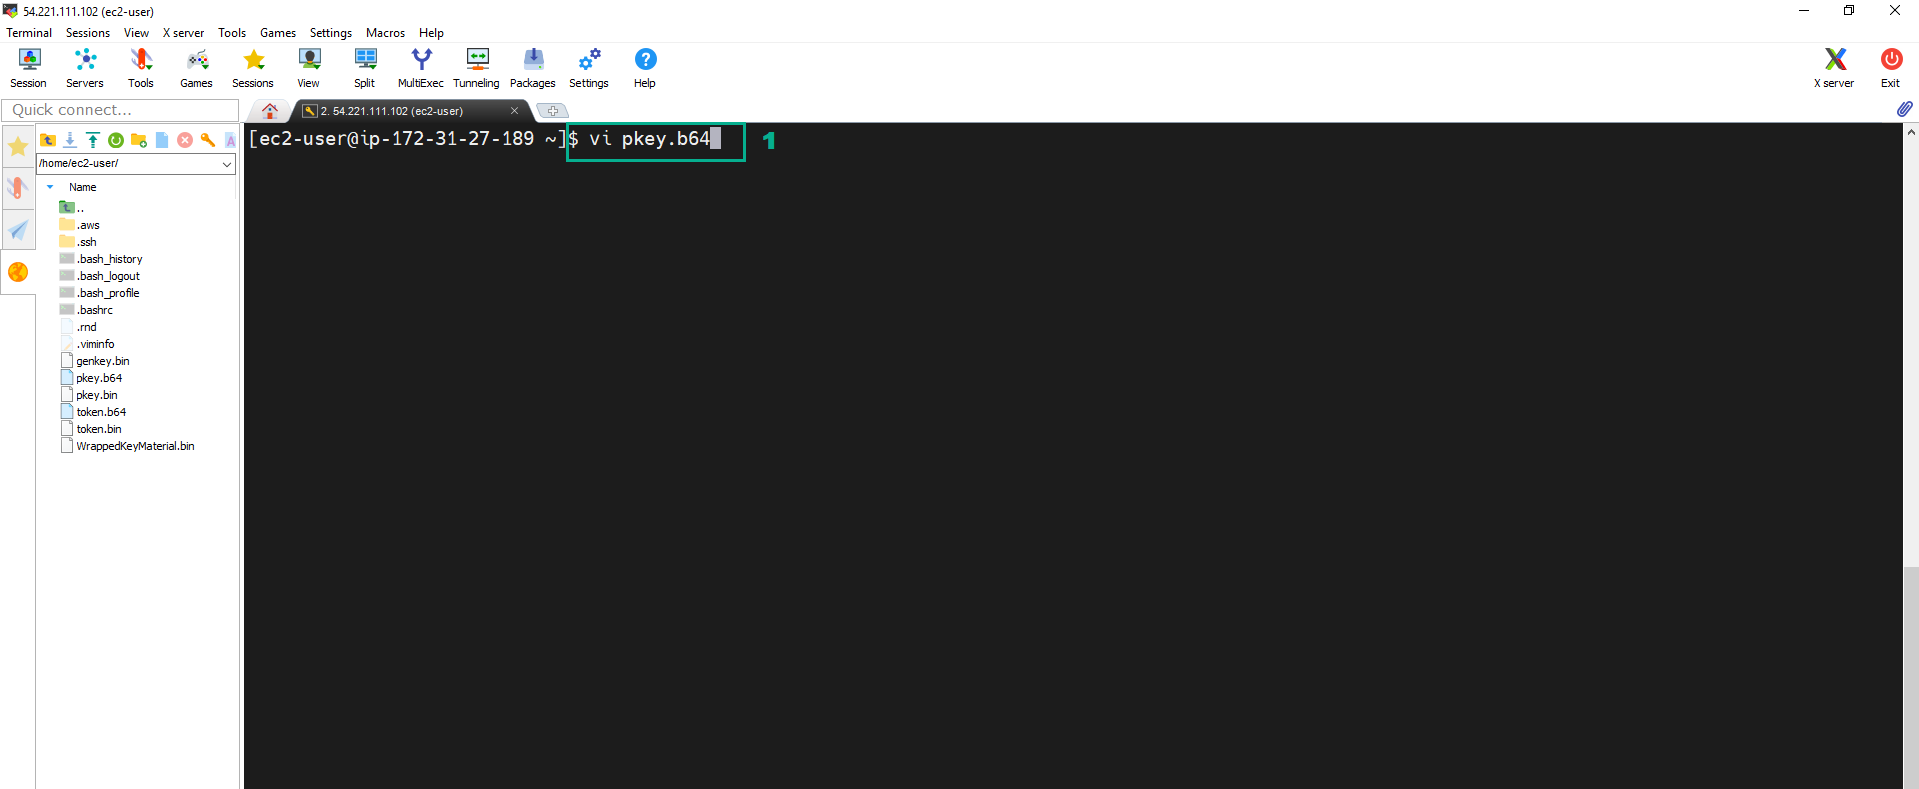
- Press i to change Insert mode. Paste PublicKey we copied.
- Press Esc.Type
:wq.Press Enter to save and quit.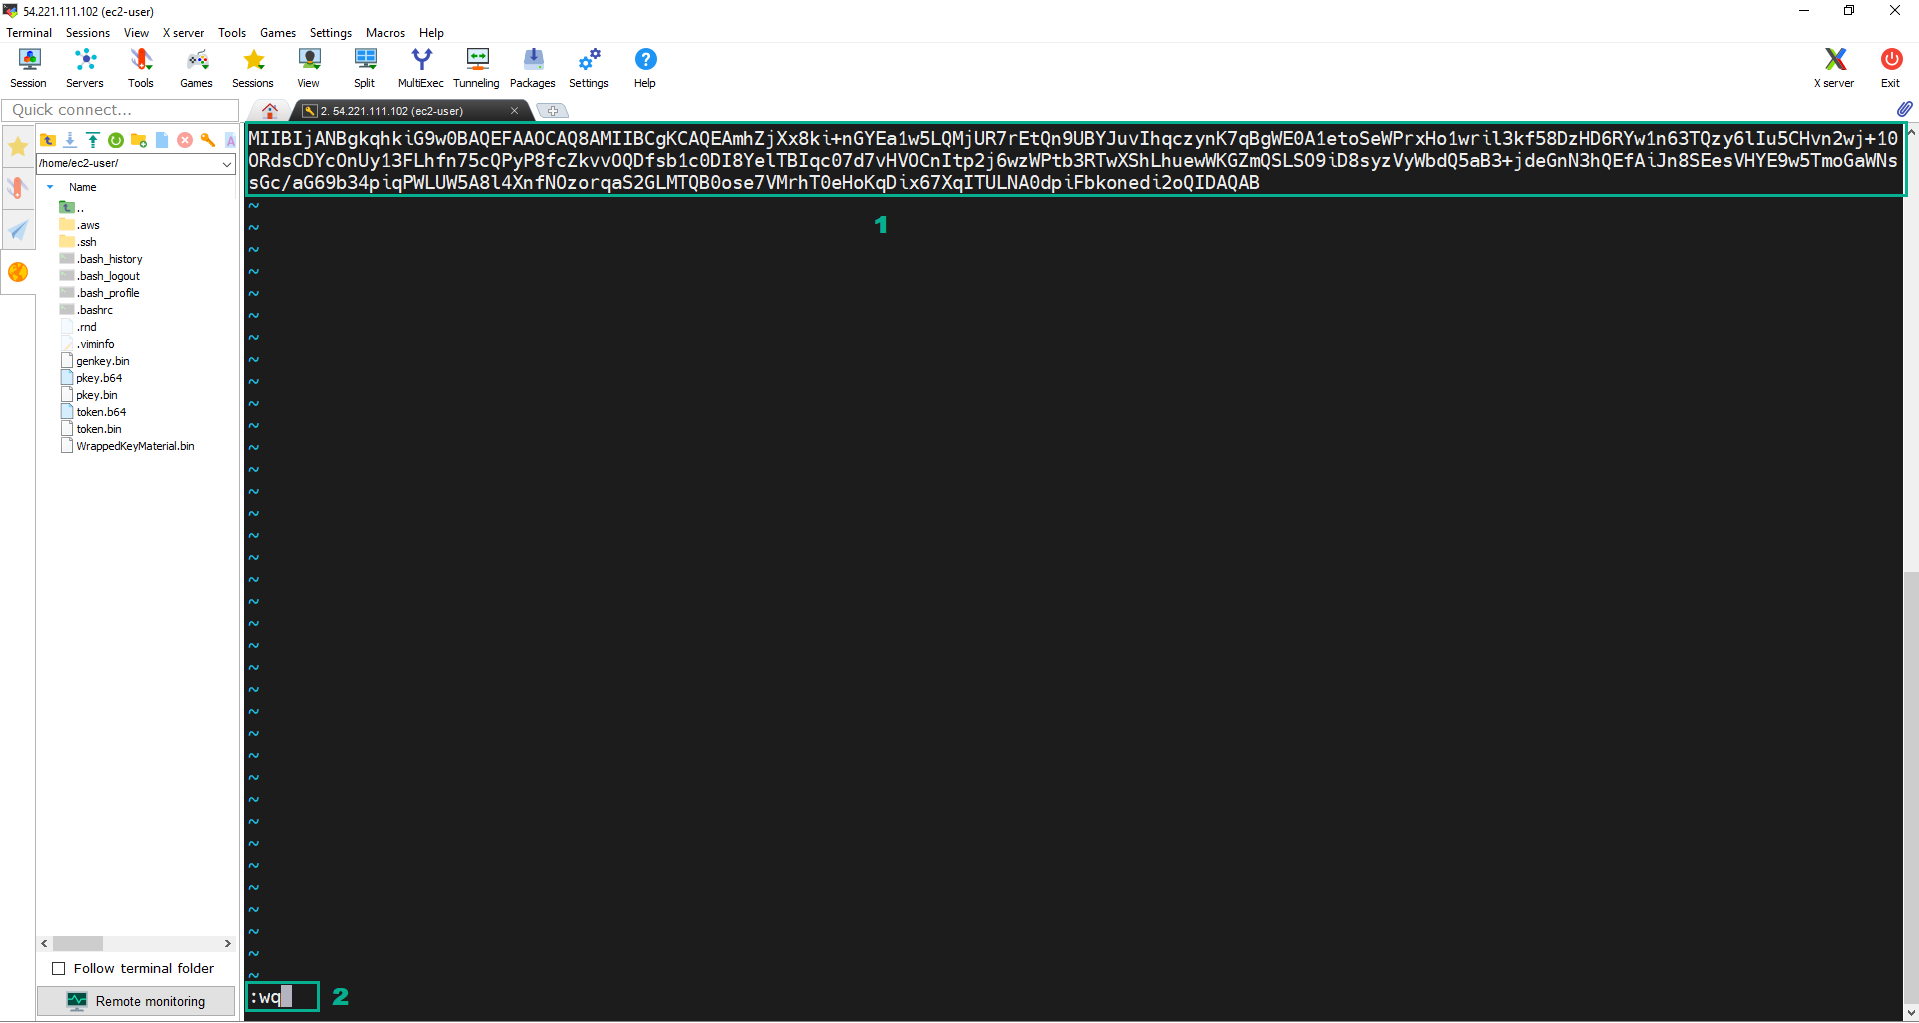
- Do the same as PublicKey to copy ImportToken into token.b64 file.
- Use OpenSSL to decode to convert the b64 files into binary files are pkey.bin and token.bin
- Execute the command:
openssl enc -d -base64 -A -in pkey.b64 -out pkey.bin. - Execute the command:
openssl enc -d -base64 -A -in token.b64 -out token.bin.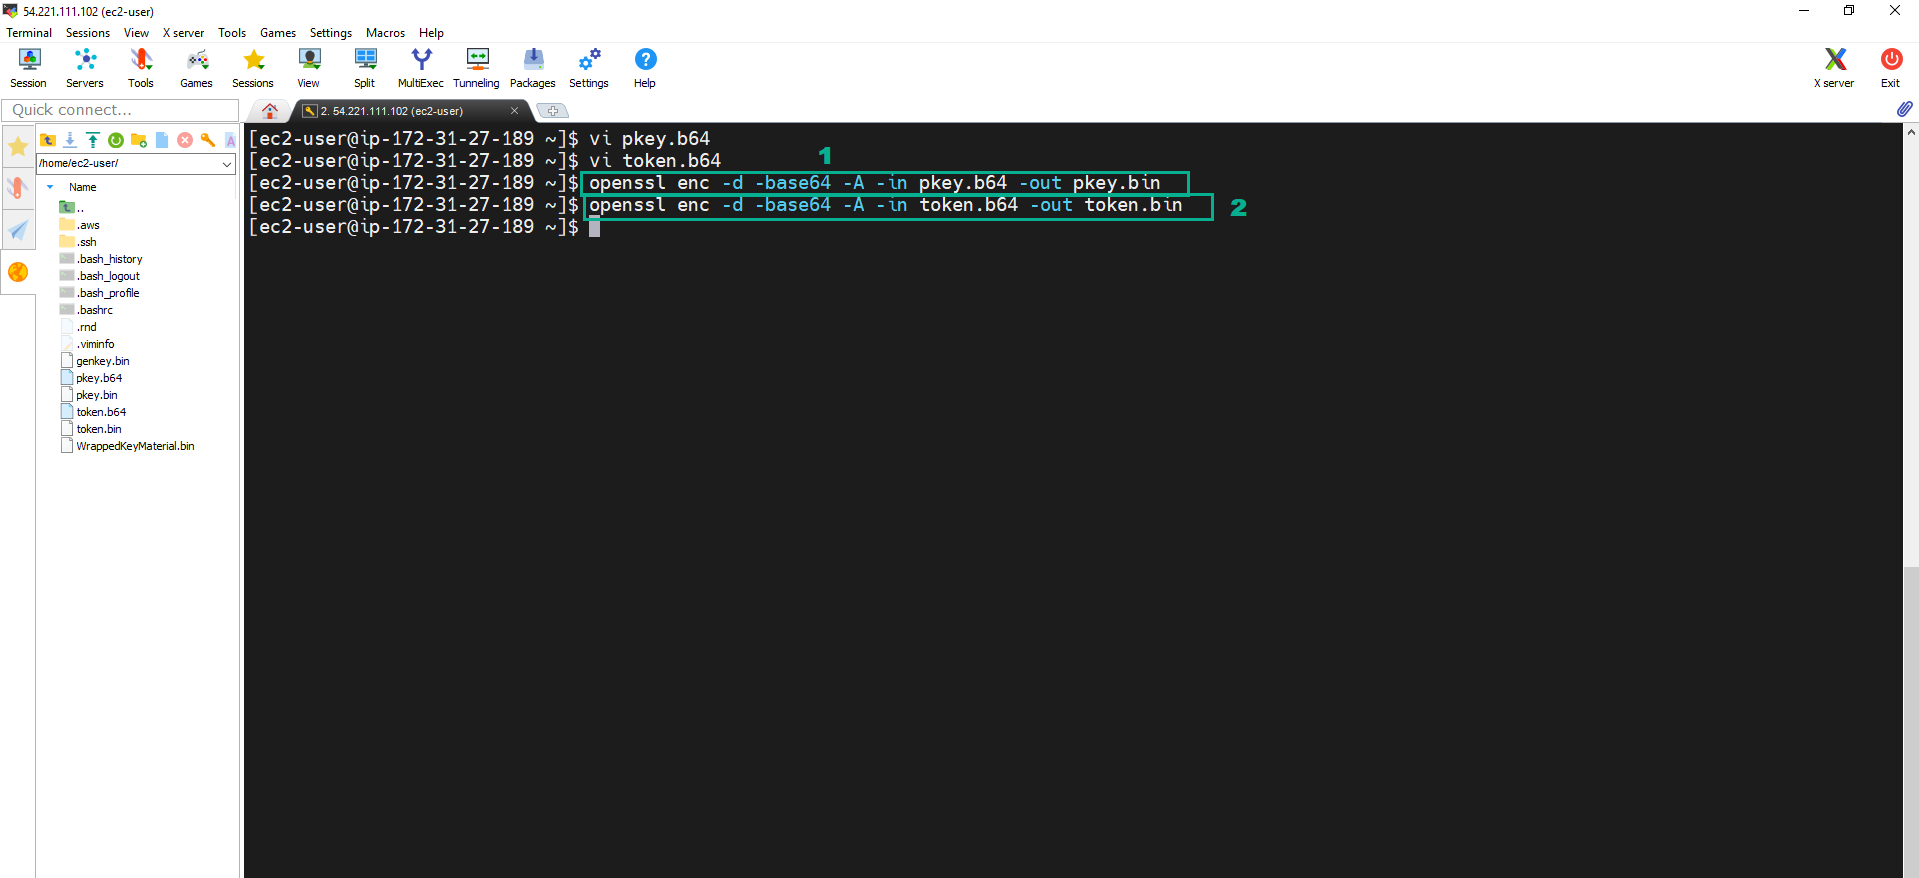
- Execute the below command to generate a 256 bit symmetric key and stores into file genkey.bin. The key that the file contains is our key material for the CMK.
openssl rand -out genkey.bin 32

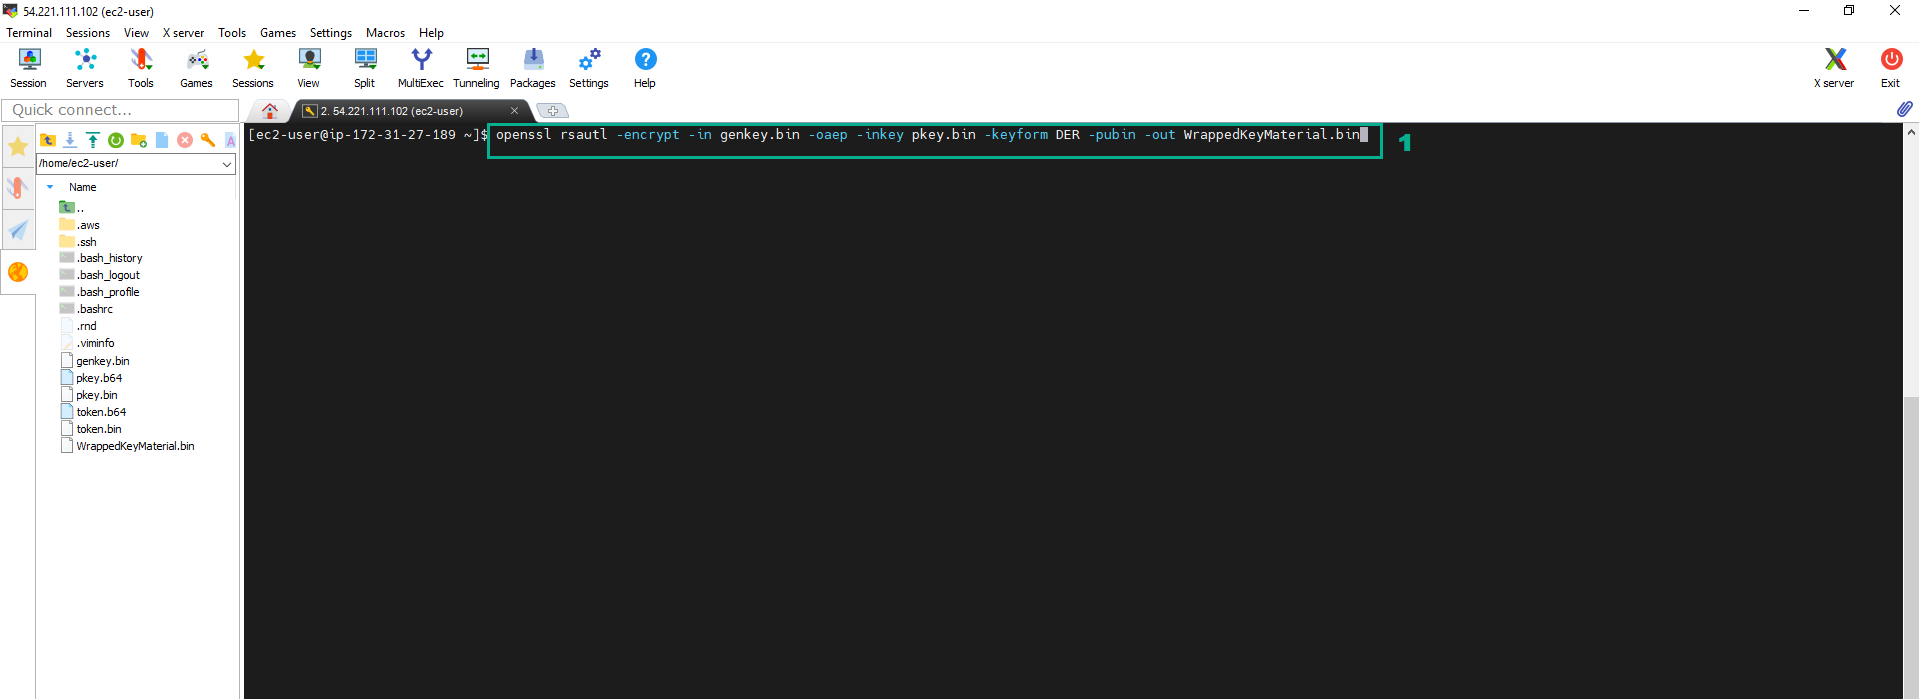
- Encrypt Key material and save into the file named WrappedKeyMaterial.bin.
- Execute the command::
openssl rsautl -encrypt -in genkey.bin -oaep -inkey pkey.bin -keyform DER -pubin -out WrappedKeyMaterial.bin
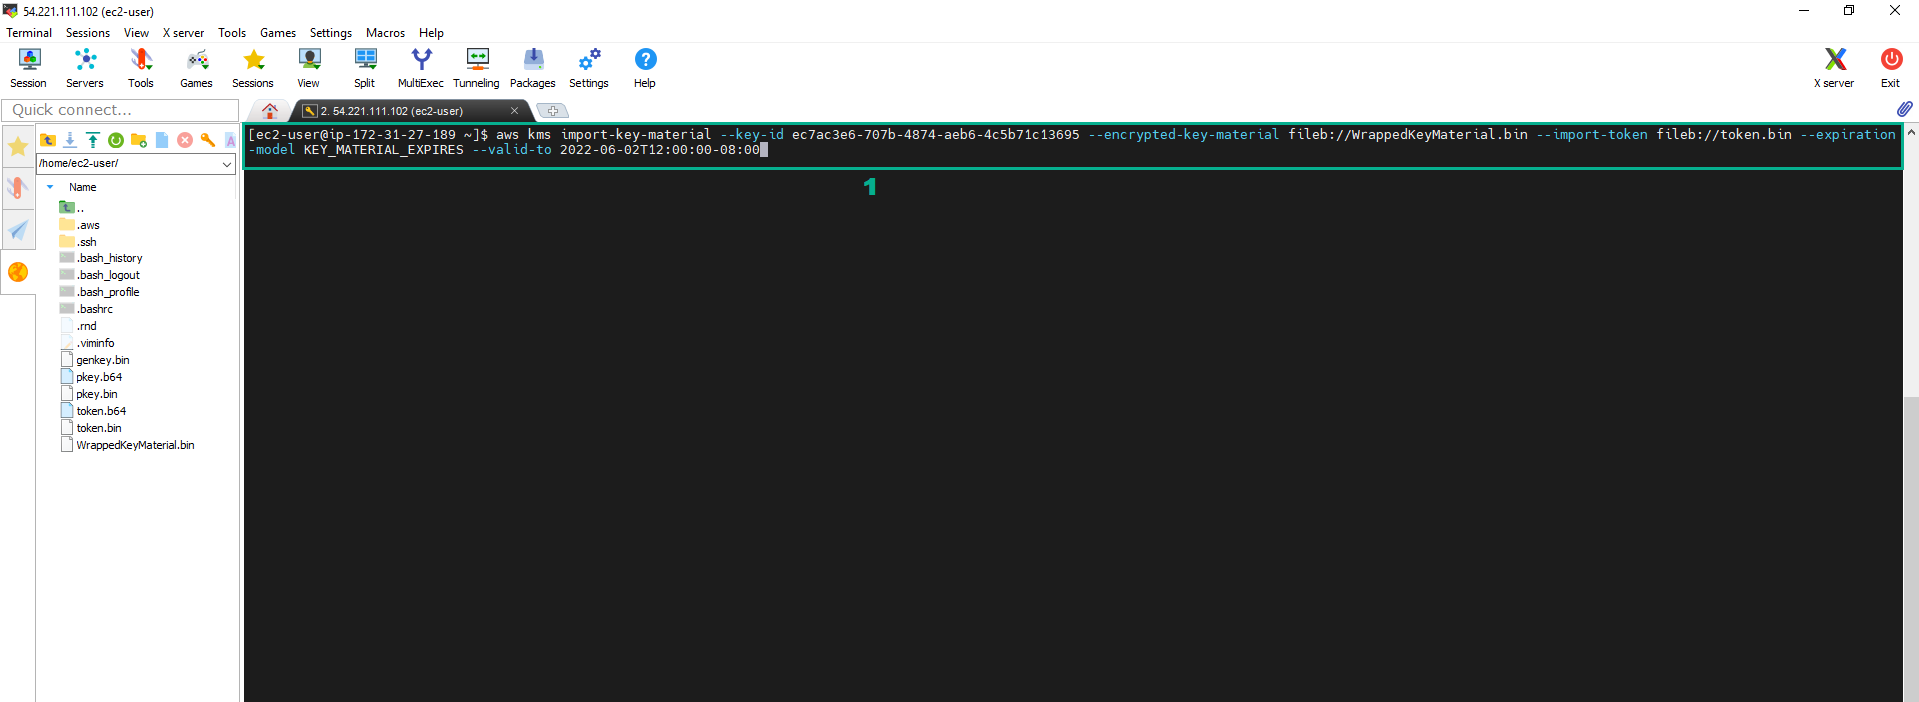
 8. Execute the command:
aws kms import-key-material --key-id <key ID of the External CMK we created in step 1> --encrypted-key-material fileb://WrappedKeyMaterial.bin --import-token fileb://token.bin --expiration-model KEY_MATERIAL_EXPIRES --valid-to 2022-06-02T12:00:00-08:00
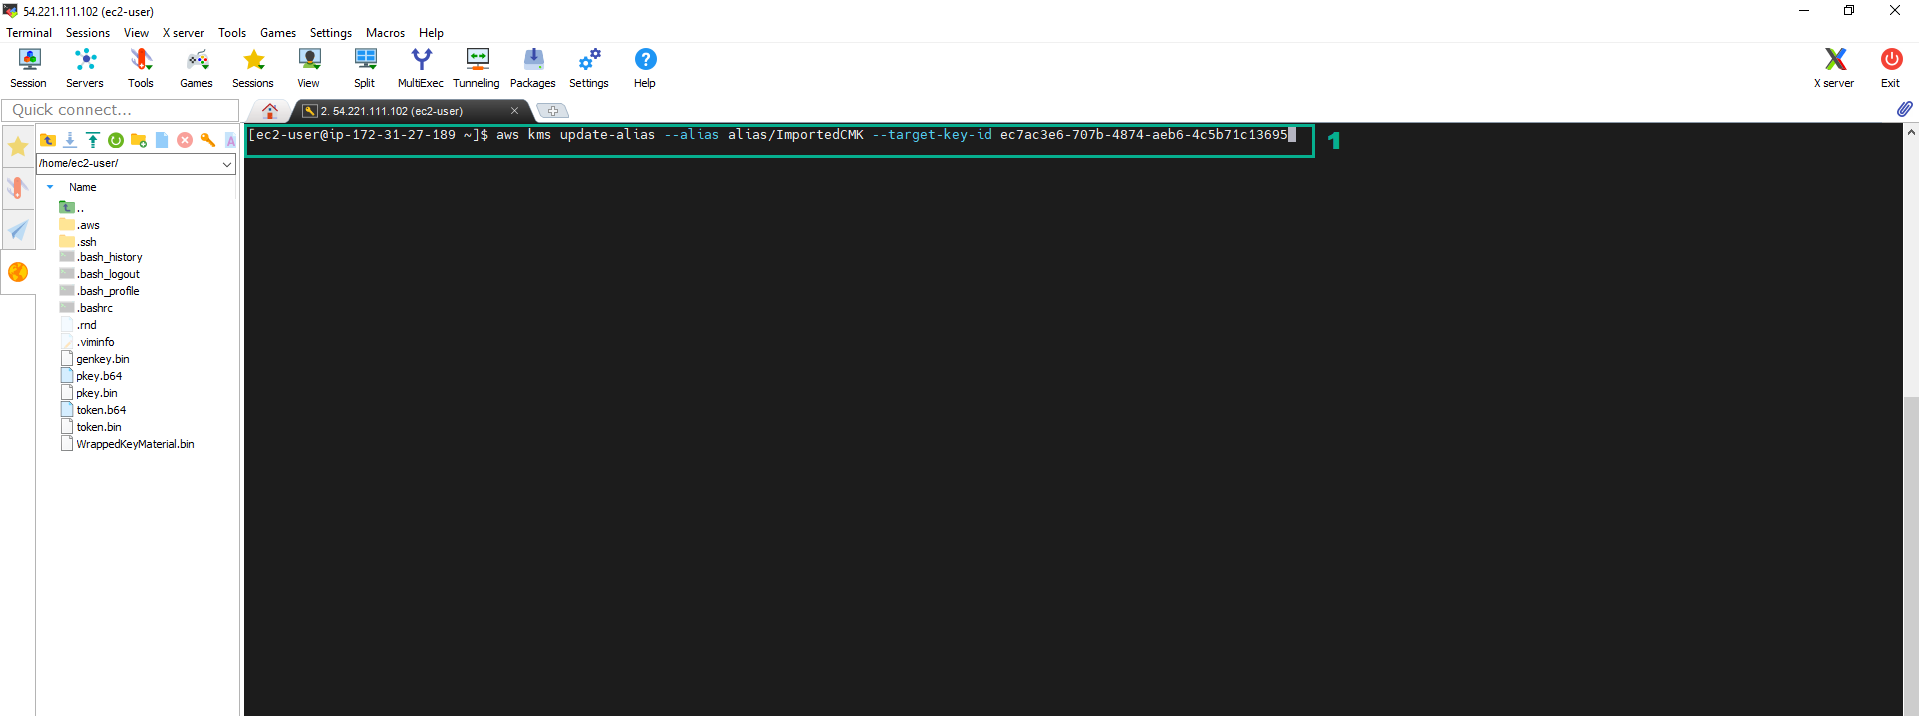
 9. Execute the below command to update the alias
aws kms update-alias --alias alias/ImportedCMK --target-key-id <key ID of the External CMK we created in step 1>
 10. To check, we go to KMS Console
- Click Customer managed keys